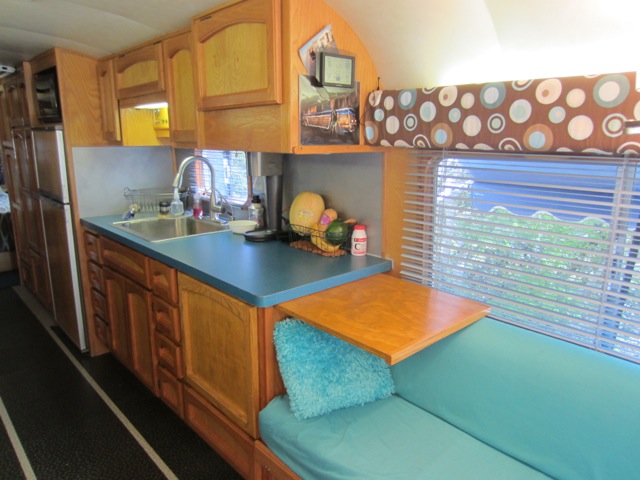
The month of February had us with the opportunity to tackle some more bus projects. The availability of Chris’ nearby uncle Brian, who is a licensed building contractor, shifted our focus to kitchen & bathroom remodeling.

After we first got the bus in June 2011, we did some basic kitchen updating that was meant to be temporary. This included repainting the countertops to start playing around with colors (and getting rid of the pink!), and replacing the kitchen sink & faucet with something more functional.
After months of living in the bus and finding we only used the propane oven as a storage cabinet – we were ready to remove the oven, make the space more usable and move forward with our Propane Free Goal.
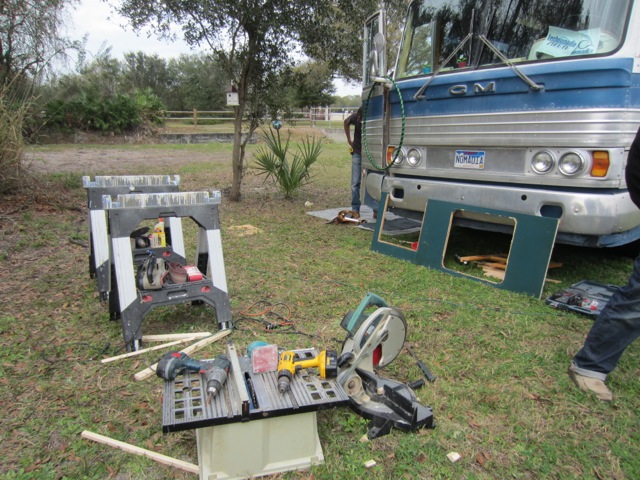
So off to Pinellas Park, FL where Chris’ cousin had some open land to let us park for a few days while we had the work done.
Aside from knowing we wanted a cabinet where the oven was and a new countertop – we had no clue what else was possible. We spent some time with Brian brainstorming and enjoyed that he was easy going and worked with us to come up with some innovative ideas as we went.

We decided to go with a laminate/formica for the countertops, as we just couldn’t justify the extra weight of a solid surface – nor could we find any that matched the decor we were going for. We found a subtle teal wavy pattern that caught both our eyes, and was available next day.
Here are some of the other design ideas we came up with:
New Cabinet
With the oven gone, we had free reign over how the cabinet should come together. Besides, while Chris fit nicely in the space, we didn’t think it would be an ideal seat.
We decided to have the door come down, much like the old oven door did.
We also designed the placement of the shelves to hold our existing appliances (induction cooktop, toaster oven, rice cooker and large wok) – and be able to eventually hold a second induction cooktop should we ever decide we’d like two.
Countertop Extension
We had been noodling over ways to make our countertop larger without sacrificing living space. There are just certain times that a little more space would be nice.

At first, we had thought about a fold-down extension. But as we deconstructed the existing countertop, I remembered we had a spiffy pull out cutting board (on the other side of the sink). I asked Brian if a similar construction for a larger space was possible to be built into the new cabinet.

It was a brilliant idea, if I do say so myself. Much simpler than fold down hardware, more usable, more adjustable (we can bring it out a little or a lot) and makes much better use of the space. We also think it looks great even while stowed with minimal invasion into the living space.
The extra counterspace is an excellent salsa making bar!
For those of you concerned about our safety – we’ll be adding some sort of latch to make sure that the extension doesn’t come flying out during an abrupt stop in the bus.
We’re very happy with how closely Brian was able to match the cabinet door design!
I also spent an afternoon sanding, staining and re-varnishing all of the kitchen cabinets – and getting the new wood to match the existing 20+ year old aged wood.

As Chris is allergic to the varnish and left for the day, and I was too lazy to remember – there are no action shots of me tackling that epic job that has still left me with a sore back.
The above picture is of me painting the backsplash with a stainless steel paint from Rustoleum. I include it to show up in a picture that is not just a reflection in the mirror, and prove that I do actually help out on occasion. (The backsplash will probably eventually be some sort of mosaic.)
Dual Desk Addition
So often while we’re working at our awesome dual desks, a little extra space would come in handy. After all, rarely are our desks as neat and tidy as shown below.
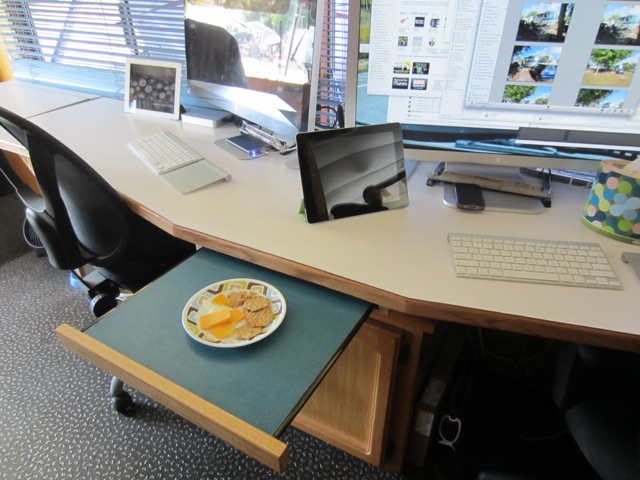
So Brian worked with us to come up with a cool little slide out table between our workspaces. And it worked out perfectly – as the surface was able to be built from the countertop we cut out for the sink.
It’s not a coincidence that the table perfectly fits two glasses of wine and a plate of cheese – perfect for when happy hour rolls around!
And it’s just big enough to fit two of our dinner plates, so this has also become our default place to eat meals together. Just turn our chairs facing each other, nosh, toss the dishes in the sink behind us and then back to work.
The little table has also been great to create a little quick extra clean desk space for paperwork, a book or setting up an iPad.
Bathroom Vessel Sink
Ok, first of all… that nonsense about going Sink Free? It was a joke! I’d better be careful what I post, as before I know it – there may be flocks of shampoo-free, propane-free and sink-free nomads roaming the planet.

As we did outline in the March-fools post, we had decided on an above counter vessel sink for the bathroom to solve the problem with the counter being so low. And we did have difficulty finding one we liked available locally in stock. We had Brian leave the counter uncut and unsecured, and lived bathroom-sink free for several weeks while we weighed our options. (Oh, woe is us.)
The pickings for a smaller sink in the 14″ size range are sort of slim, but we had a couple sent in. We immediately sent back the clear frosted glass one – as it was way too green in color and bulky feeling.
But when the hammered nickel bowl sink arrived, we were in lust. Stylish, small and lightweight.
It even seemed to nicely match with the vessel nickel waterfall faucet & pop-up nickel drain we randomly picked out on Amazon.

Chris went to work researching how to properly install a vessel sink, bravely drilled some holes in our brand-new countertop, did some plumbing magic and.. voila!
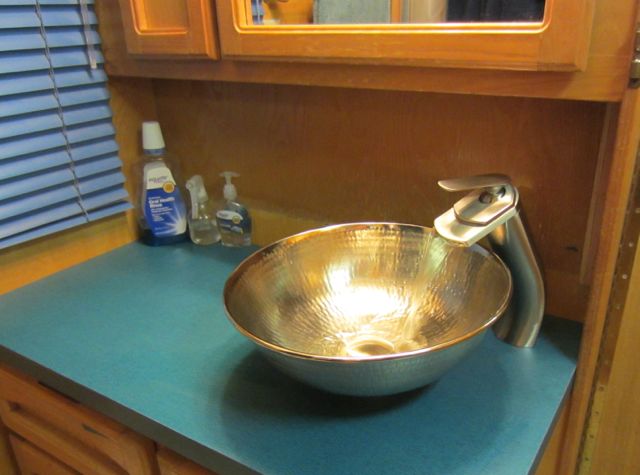
We went with a corner mount for the faucet, which has been completely awesome and functional. And overall, we could not be happier with how it all came together. Especially since we had no plan and kinda made it up.
We’re still in a bit of a honeymoon phase with it, and probably wash our hands more than needed.
I still need to re-finish the wood in the bathroom, and the backsplash will also probably end up with some sort of mosaic. But that project will just have to wait until my back heals up some.
Video Tour
Now that we’ve completed a major round of remodeling, I’ve updated our video tour.
It shows off our awesome dual desk and the new bathroom & kitchen, and shows off the recovered valences (which may or may be not be temporary – we haven’t decided) and our start of replacing light fixtures.
That completes this round of re-modeling! We’re really happy with how the bus is becoming more and more US with every step of the way. We’re also thrilled with how we’re managing to get projects done as we travel.
Each project has its own story, friend helping out and location. Which just makes us love our bus even more!


Wow, we like your cooking setups, both inside and outside. Sheee! We hope you both don’t mind it if we borrowed a few ideas? With the wife’s suggestions and my tools/skills our houseboat and bus will have a few of your examples! Oh yes, of the last couple of meals you demonstrated, we wandered if you’d tried using beer or wine in the dishes? Keep up the good work! Marvin and Collette
What do you do with your computers when the bus is in motion?
The laptop gets stowed somewhere safe. The monitors are clamped to the desk.
Some time has passed. Do you still like your bathroom sink set up?
Absolutely!! We love love love it.
Nice job on the slide-out countertop extension! I can use that idea for some of my smaller remodeling projects. Thanks for sharing!
Seth
I really like how it’s all come together – and it really looks so spacious, light & airy, even in pictures! Congrats on a successful project! 🙂
Whoa. That’s a lot to take in. Might have to come back. (it’s late. there’s been wine. You understand)
Wanted to say though, if you figure you have to latch the slide out board to keep it from coming out in a panic stop? Hm, chances are that that piece of lumber is going to be the least of your worries if the vehicle comes to any stop that’s abrupt enough to get it to come flinging out at you. Just sayin’.
But hey, latch away!
Heh… no point risking a decapitation-by-countertop on top of anything else causing/resulting from a sudden stop.
Sweet! Color me impressed.
Did not know, induction cook top is moveable, I will have to take a closer look at that appliance. The sink bowl and corner faucete look like excellent ideas also.
We love our little induction cooktop. We went portable for the flexibility, and they’re pretty darn cheap (about $70). A built in one costs several hundred.
Awesome remodel!! The bus is looking beeaautiful!!
Nina
Thanks, Nina! Looks like the beast is all shiny pretty now too 🙂
Coolio, Baby! I very much enjoy the fabric you chose for your valances. The bus is really coming together. So much better than buying a motorhome or something all ‘done,’ this way it’s you.
Thanks Sherry.. it’s been a fun process to really make it ours.
We like the fabric in the bedroom for sure. We’re not convinced it’s the right choice for the main area. We still need to re-apholster the couch and chairs. So I’m sure that will influence our final choice.
So beautiful! You did such a good job on the remodel!
Thank you! It’s been fun too!