Because of a lot of research and effort, we found a bus that exactly met our criteria – completely liveable from Day 1 that we could potentially remodel as we went to make it our own. And remodeling, little by little, we have done.
It seems at almost every major stop in our journey, we’re making a little tweak here and there.
And this stop, has been no different.

This stop’s remodeling effort has been on some re-upholstery improvements.
First: The Valences
The fabric on the cushions and valences from the original conversion back in 1989 are actually in pretty phenomenal shape – like much of our bus. The coloring is obviously a bit faded, and not exactly our palettes of light blues and pinks. Our goal has been to morph the colors in the bus to something more us – which we’ve done by replacing the floors and countertops.
But the fabric remained.
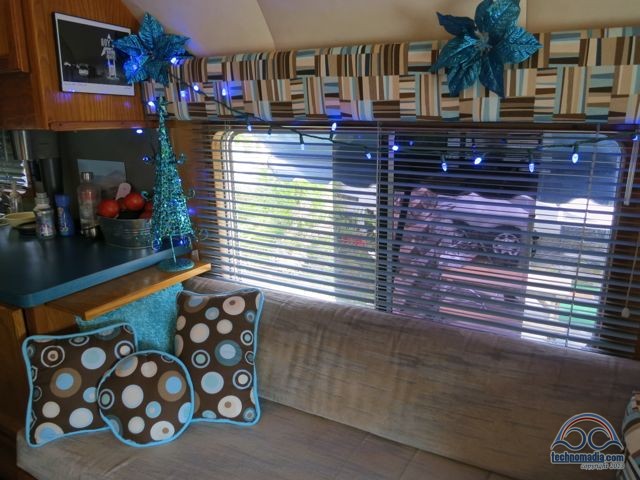
We started playing around with colors by attaching sarrongs and scarfs to the valences, to see what worked for us.
It also gave the bus a bit of a gypsy feel inside – which was fun, for a while.

It was actually after taking this exact picture last January that we realized we had lived with the thrown together look for long enough.
That very afternoon we went to our nearest fabric store and bought some fabric to do a temporary recovering of the valences to get a more finished look.
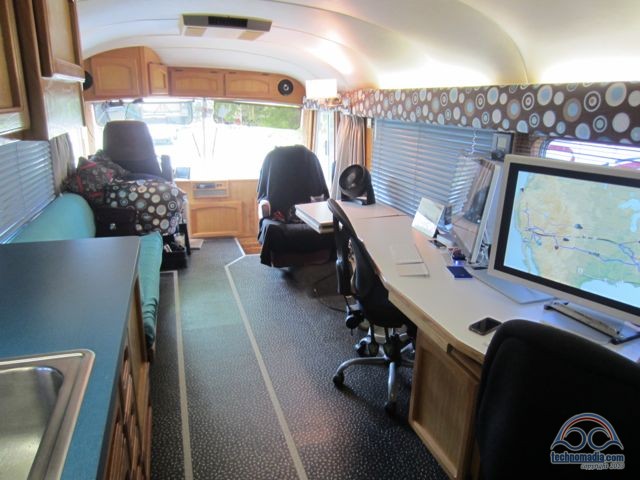
I’m not a seamstress by any stretch of the imagination – so I did my best to chop up the fabric into long strips, and attach them via straight pins on top of the existing fabric. It created a pretty nice look. And we really dug the funky circle pattern.
Problems were:
- The fabric was just a cotton quilting fabric, and it quickly started reminding us it was not the right material for the job.
- It was definitely an amateur install job. Strings from my scissor hacking would hang down and straight pins would pop out
- Somehow the section above the passenger chair had a bunch of pinhole size pricks in it. (Cat?? Nah, she’d never do such a thing.)
We have visited several fabric stores over the past months trying to find something as groovy looking however, and always came up short.
While we were parked in Melbourne, my mom has a talented crafty friend who said she would be happy to help us spiff up the interior a bit and do the valences correctly. So the hunt for the right fabric intensified.
My mother actually found something that showed some promise, and after having a large sample of it hanging up for a couple weeks – we were ready to commit.
Marie went to work measuring and sewing up nice edges.
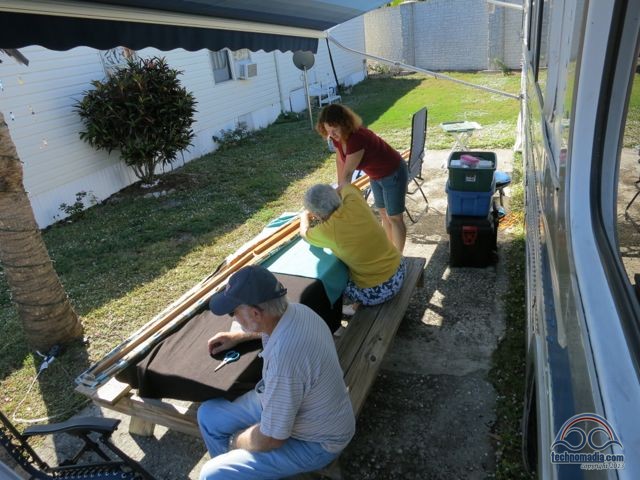
And she spent a morning over with me getting it nicely stretched and stapled.
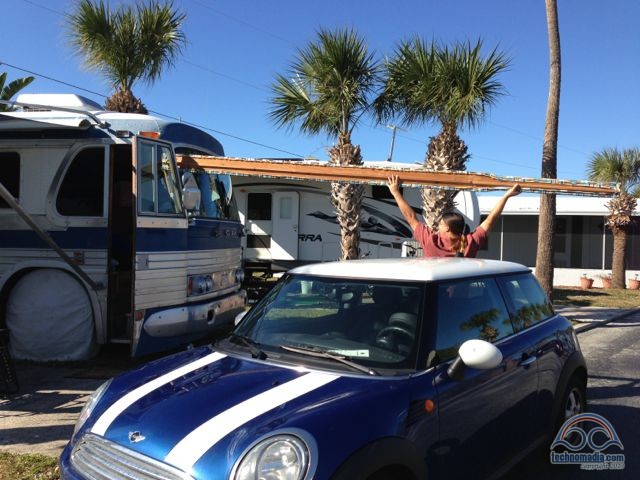
Thankfully, with the way the door angles at the top – we were able to slip the ~16′ long valence in through the ‘V’ when the door is open.
And I present you – our newly finished valences:


While we had the valences off, we also re-started our project of replacing the indirect lighting behind them. They’re currently three 48″ T12 flourscent fixtures, and the ballasts are going out. So we’ll be deteriming which is a better solution for us long term – installing LED lighting, or replacing the ballasts with more power efficient T8 flourscents.
Couch Wedgy Pillow Thing
Another project we engaged Marie’s help with was coming up with a solution for our couch.
Our couch is basically a sheet of plywood with a cushion on it, and a back wedge. The couch is on a drawer mechanism that slides out to be a usable single bed for an occasional guest. Or more often for us, as a snuggle area while watching movies across the way on the 27″ monitor, or a nap nook.
It’s fairly functional, but not as entirely comfortable as we’d like it.
We’ve contemplated everything from totally replacing the couch with a more traditional RV couch (problem being the wheel well underneath to work around) or re-covering it to be more stylish, while possibly adding another layer of cushion to it.
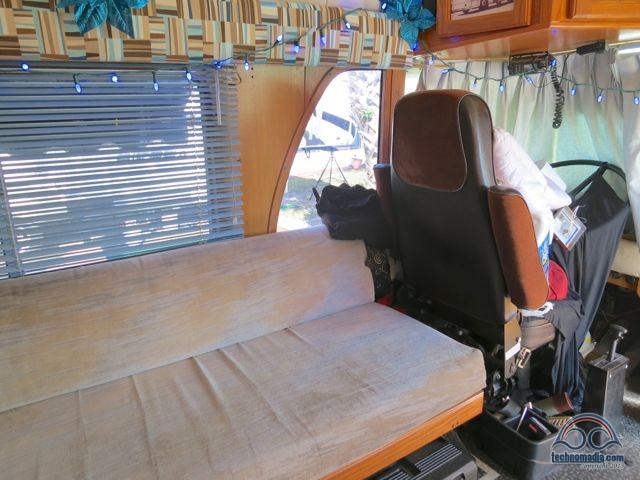
One of things that makes it uncomfortable is that there’s nothing to lean up against at the edge of the couch – leaving a pretty big gap between it and the driver’s seat. This always left us craving a big cushy ‘something’ to snuggle up against for reading a book, taking a snooze, surfing the iPad or watching a flick.
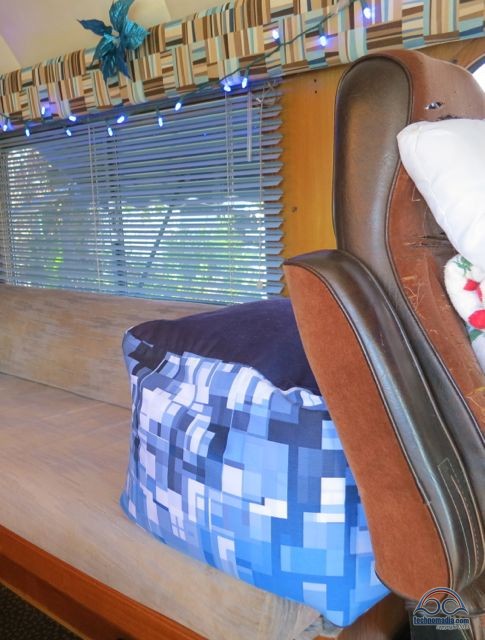
I found this bean bag cube dealie bopper on clearance earlier this year that fit pretty well into the space. For $12, it’s been a decent solution – but it definitely did not match the decor. It was also slightly too tall and lacked a bit of the ideal body-cradling shape we had in mind.
So, we did a lot of noodling around to come up with the measurements of our ideal shape – and Marie made us a custom pillow to fill the space.
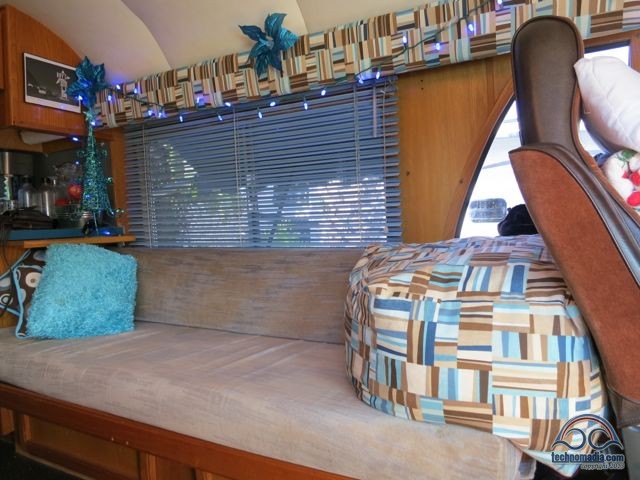
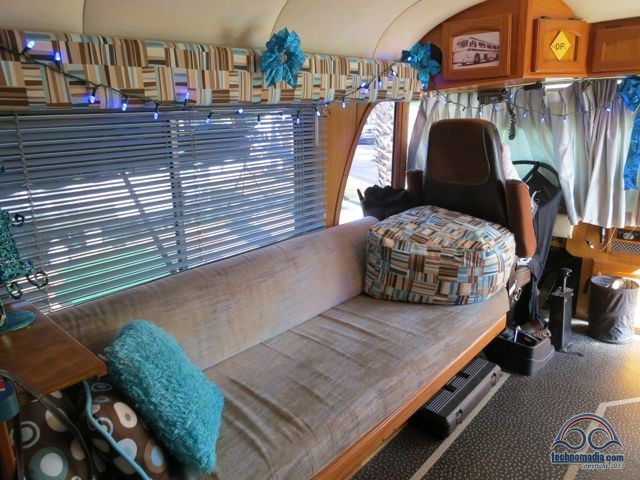
It’s a huge improvement in both the comfort and look of the living space. It feels really good to have some finishing touches coming together. While the projects were kinda minor, like any project in a small space – they make huge impacts.
We’ll tackle the whole couch thing at a later date and decide if we recover it or replace it. Another project is replacing the passenger seat (and maybe the driver’s seat), as the fabric is just about to fall off it and it has a couple broken mechanisms. So we’ll start seeking out a RV surplus resource and look for something comfy, and maybe a couch will come our way too.
Want a re-cap of all our past bus projects? Here’s a link to the Bus Project Log.

Definetely go with LED lighting over fluorescent any day. With the bouncing and jostling, the LED will hold up better and be less weight and a better quality light source.
Hard to resist though, to keep tweaking, eh! I keep having to stop myself buying pretty bedspreads and little shelving units that “would just fit under my desk…”
It’s the nesting instinct, I got told once.
I’ve got to fight it – keep reminding myself, “Tony, in three months time you’re leaving to spend half a year in Mongolia…” But ooh! Great mirror for the bedroom…
NO!
:0)
There is an advantage to having a house that moves with you. You can nest and take it with you to the next great location. But the shipping costs to Mongolia might be a tad prohibitive :).
Cherie, looking good! I liked the circle fabric but the new one is even better. Good call with the throw pillows. It is a nice contrast but ties in to the new fabric. I wonder if you could go with one of those back-supporting bed pillow things people use to read in bed? I have one in my TT for back support while reading/TV watching on the bed and it fills the bill. My MIL gave it to me but I think a Bed n Bath type place might carry them. Mine is feather filled and dense, heavy enough that it does not slip if unsupported. They have non-allergic alternative ones too. Oh and maybe a memory foam topper for the extra couch cushiony-ness? with a new slip cover. You can custom cut one with an electric knife of all things. (Crafters use those for cut-to-size upholstery foam) Maybe make comfy seat cushions from the leftover bits?
Hi Soody.. thanks for stopping by!
We did look at all sorts of pre-made wedges and supports, and couldn’t find anything to fit the space. The cube thingy came the closest, but what was needed was something custom made.
We have also thought about adding a layer of foam to the cushion if/when we recover it… or even potentially having all new foam made a bit wider. Overall tho, the cushion itself is pretty comfortable and has held up well.
I love how the valances are the exact same color palette as the old fabric you made pillows out of. Lookin’ good in the neighborhood.
Thanks Susan.. we were very happy to finally find a fabric that matched the colors, which really had grown on us.
Very inspiring! We just bought a new-to-us Class C. It looks hardly used inside, which makes me hesitate to start redecorating. But, it is so beigey, it is really NOT our color palette at all. Maybe I’ll do what you did, start with valences. And we also have that gap between the couch and the seat, but I would want something a little smaller than your bolster. Nice job though–I love all the turqoise. Awesome awesome bus all around, as you are well aware.
Hi Debbie.. our bus started off more pink than I like. We’ve been doing small things to remove that. When we first got it, we also did some temporary changes to try new colors on – like the temp valances. Another thing we did was paint the countertops to add new splashes of colors until we decided on the longer terms plans for the kitchen.
It’s fun to play around
Chris and Cherie –
What is so cool about Full Timers is the people you meet long the way – the sotries, events, and happenings of a thing we call life.
My son is a computer guru which keeps me functional. LOL
Sherman and I are in Illinois at the time, I had surgery in Sept. For the past 3 years we haven’t felt cold for we Work Kamped in Florida. It will be the test of our RV (our 3rd) for I have never spent a winter in here. We have Central Heat and a fireplace and it is unbelievably not cold. I have kept up with you and Chris to some extent – for you are lot like us when it comes to “mastering plans”. The remodel looks nice and adds charisma to the bus – good job. You can see ours on our Facebook Page and I can post a pic of the inside – Keep up the good work and I love the Drone – the camera thingy he can fly into the air – that is sooo cool. Enjoy Life and Stay Safe
Patti and Sherman -Patti J Hyatt
Hi Patti.. thanks for dropping by the blog! Keep warm and heal up.
Really nice job! Your bus is beginning to look like one of those fancy Prevost conversions. :c)
Hahaha… thanks. We’re still a long ways off to being considered ‘fancy’ tho.