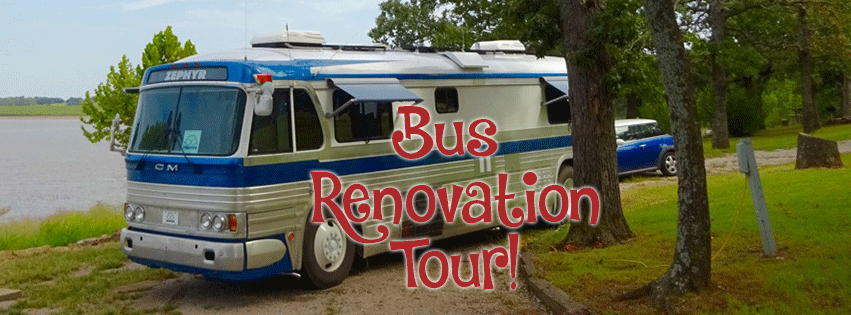
Now that life is getting a bit back to normal and we’ve had some time catching up – it’s time to begin sharing about our bus projects!
To start the ball off, we thought we’d share the ‘nickel tour’ with you.
If you have the bandwidth to spare, we highly recommend this 17 minute video tour that goes over most of the projects we tackled this summer at Master Tech RV – it’s the quickest recap.
If you don’t care for video or don’t have the bits to spare (we understand – we hardly watch any video blogs ourselves) – below is a pretty comprehensive written summary of the projects. While it won’t be nearly as immersive as the video tour, it’ll at least give you the recap.
And a one-year re-cap sharing our 5 Favorite Upgrades:
Before you ask – we won’t be sharing all of the project costs quite yet. We’re still digesting the overall bill, and how we’ll present the figures for each sub-project since it gets complicated due to the scale and uniqueness of the tasks we tackled, and how intermingled so many of the things are.
As time goes on, many of these projects (such as the hydronic system or the plumbing upgrades) will have dedicated posts about them with more details, sharing our real in use experiences as well as the costs of each upgrade.
We’ll update this post with links as those articles are created.
Exterior Projects
Before Pictures
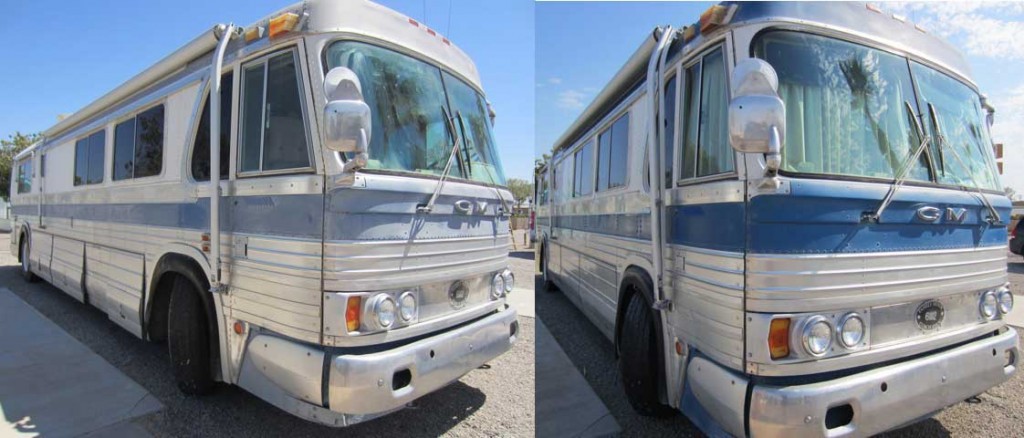
New Paint & Body Work
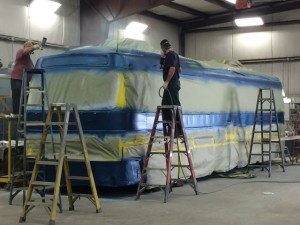
The biggest project on the list, the project that kicked the rest of them off, was the new paint job.
Master Tech stripped down the old paint, did some minor body work to refresh some of Zephyr’s rough spots (and unfortunately some new ones got added in the process), primed and painted.
We stuck with basically the same paint scheme as before – we had always loved the look of the bus, and we are not fond of typical modern RV ‘swoops and swirls’ paint schemes.
The only major change was putting our own very personal ‘swoops and swirls’ design on the back of the bus.
Why repaint? Zephyr was last repainted in the late 1980s. While she looked pretty spiffy from a distance, up close her paint was peeling, scratched, heavily faded, oxidized, and we have had some rust spots forming on the steel front and rear caps (the rest of her body is aluminum). And while many have suggested we should polish up the aluminum too – the 4106 was delivered from the factory with a satin anodized finish. We like the satin look of it, it’s easy to keep clean, and we have no intention of ever polishing her to a shine.
Repainting however was long overdue to keep Zephyr in great shape for the future.
We got quotes from a few companies and always knew that a quality paint job would be spendy – we had actually factored that into our original bus hunt considerations when making offers. Master Tech’s proposed price came in fairly competitively at $16-$18k including some minor body work, removal & re-installation of all exterior accessories (ACs, solar panels, trim, windows), and at least a double clear coat.
Having seen some of their paint work before, we knew they do an outstanding job. The end bill for the paint portion was right on target with their quote, and we’re beyond pleased with the results.
The full blog post: The Paint Job!
September 2016 Update: Still loving the new look.. we swoon everytime we walk up to our coach. The paint and clear coat has held up thus far, no issues.
Destination Sign
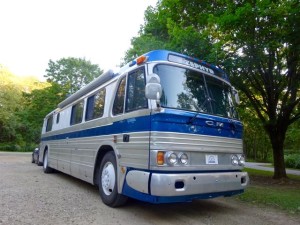
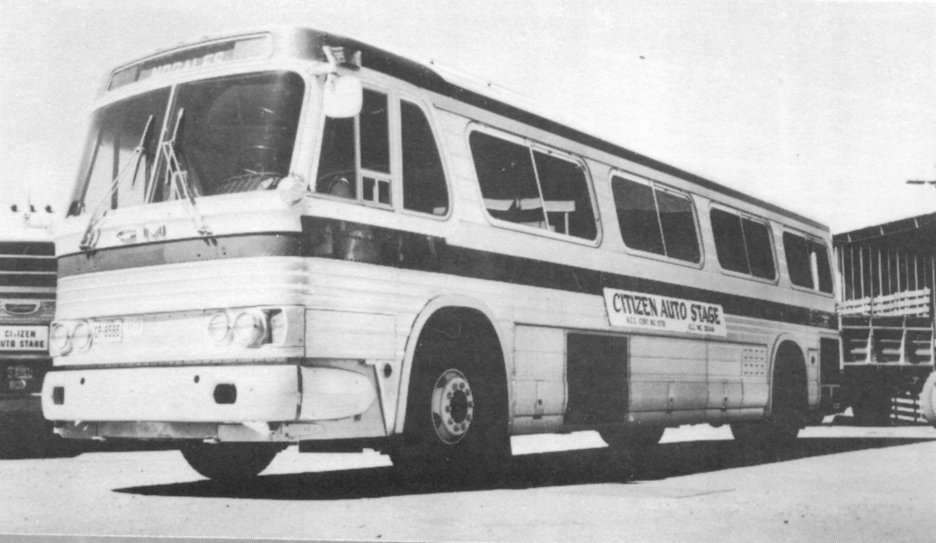
When our bus was in service (it used to be an intercity highway bus from 1961-1985), it would have had a destination sign above the windshield. At some point the old destination sign was removed and welded over – as many buses converted to an RV are trying to avoid a “bus” look.
We on the other hand LOVE looking like a bus.
The glass for the sign is rare and difficult to track down. Our bus angel RJ surprised us one afternoon and said he happened to have a spare he was willing to ship us.
Master Tech cut out the patch and was able to install the glass for us – and we think the end result looks mighty nifty!
For now, we made up a quick ‘Zephyr’ sign… but we have other plans for the future.
September 2016: Amazing how such a small detail makes a huge difference in the look. We’re loving it. So far, only one person has asked us: ‘How far is it Zephyr?’ yet. Future plans for the sign area.. probably put off for the long term. Just not enough time, and we’re pretty happy with what we have.
Awnings
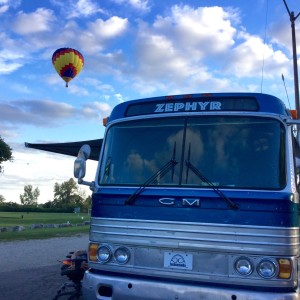
Our awnings were in pretty sorry shape when we arrived at Master Tech.
The main awning used to have ugly ‘arms’ that were overly clunky, and which partially blocked the rear view mirror while driving. Deploying the main awning was a major PITA too, so that we hardly ever bothered with it.
We hoped to upgrade to a newer style power case awning (without arms) instead, but knew it would be tricky to find a way to mount a case awning on our curved roof.
We sent out inquiries to all the major awning manufacturers looking for ideas, but they all threw up their hands or ignored our inquiry. Dometic actually sent out an engineer out with sample European brackets – but they still couldn’t come up with an answer.
But our friends at Dometic offered to gift us new awnings if we could figure out a way to make a mount work.
Master Tech took on the challenge, and created a beautifully fabricated custom awning bracket that looks and works great. Of course – our fabrication & installation costs were quoted to be more than the retail value of the awning!
The new awning looks SWEET and really improves the lines of the bus. And it deploys and retracts with the touch of a button now too!
We also replaced our worn out small window awnings with nicer looking metal-wrapped new ones – giving our bus a great new look both with the awnings out and while stowed for travel.
September 2016 Update: Totally loving the case awning from Dometic! It functions so smoothly, and pushing a button to deploy or take it in just feels downright luxurious. Love being able to put it out just a little bit or a lot. The wind sensor seems to work, but we’ve not quite worked our trust level up to leave the awning deployed while away from the coach for long.
A year later, this upgrade mades our ‘Top 5 List of Favorite Upgrades’.
Kiki Hooks
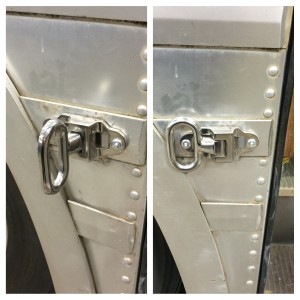
The problem with not using awning arms is that there would be scars left where the old ones used to attach.
Tim at Master Tech had the brilliant idea to come up with some sort of hook to attach Kiki’s leash to, covering the scar and making it functional. Perfecto!
Kiki’s Post: Creating a Pet Leash Hook on an RV
September 2016: Loving these hooks so much, so super convenient. Don’t tell Kiki, but we also use the hooks to secure our bikes to.
A year later, this upgrade mades our ‘Top 5 List of Favorite Upgrades’.
Front Door
Our front door needed some help to be more secure, better looking, and better sealed.
Master Tech tracked down a keyless door lock by Bauer Products that could closely fit into the existing hole with only some minor modifications. It looks pretty, but unfortunately the unit we received was defective and the keyless part isn’t yet functional. Bauer sent a replacement, which we we need to swap out when we get a chance.
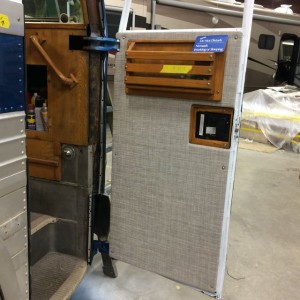
Master Tech also tackled re-sealing the door (we tracked down original weather stripping for our bus from US Coach – if you have a bus, you should have 888-262-2434 saved for tracking down parts) and recovering our door to make it look better – using some demo woven vinyl fabric they had on hand by Infinity.
All and all, visually, the door now looks great.
Functionally, we’re still tweaking to make it all operate smoothly. We’re having some door sticking issues that are a bit on the annoying side – likely from a combination of the door lock and the new weather sealing.
September 2016 Update: We finally got around to installing the replacement lock in early October 2015, and life without keys is AWESOME. The lock works great so far, and we’re loving it.
Our only complaint is that the warning signs that the batteries are dying is difficult to detect (it’s just a series of beeps, which is easily confused for entering your code wrong). We missed the signs the first time, and got locked out of our bus when the lock quit working (thankfully we had the same key accessible.)
Dual Pane Windows
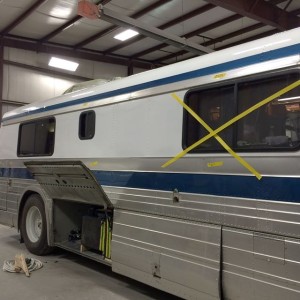
Long ago when our bus was converted in the late 1980s, the original swept forward bus windows were removed and regular rectangular single pane RV windows from Peninsula Glass were put in.
We knew that all of our windows were pretty much in need of a total rebuilding after so many years in service, and a few of them had small leaks.
Master Tech gave us a quote of about $300-$350 per window to rebuild them and replace the screens.
We contacted Peninsula (now going by Motion Windows) for a quote on new dual pane windows – an upgrade we’ve been curious about.
To our surprise, each window could be fully replaced for $350-550/each. With so little price difference, it was a no-brainer to do the upgrade and get completely modern windows rather than just rebuilt old ones. All and all, the windows were $4800 delivered, and installation was covered as part of the paint job.
At the same time, we decided to go with a lighter tint on the front living room windows – which gives us more natural lighting options. The bedroom and bath remain a dark tint for privacy and light blocking.
We don’t regret the decision one bit. The dual pane will give us better sound insulation (already noticeable while driving) and better temperature regulation. And they look REALLY great.
Report on the windows from a boondocking perspective: Earning Our Abundant Boondocking’ Merit Badge: Bus Renovation Report
September 2016 Update: Loving the windows! Definitely notice sound reduction, and pretty sure they’re helping with temperature control (hard to measure with new temperature controls and new windows all at once, after all).
Our friends Peter and John of The RV Geeks ended up ordering a window from the same company, and did a fabulous video in the factory, and of how to replace a window on your own.
Old Furnace Covers
When we bought our bus 4 years ago, one of the first projects we tackled was ripping out the old furnace. It needed a bit of refurbishing to work, but more importantly it was under the dinette that was top on our list to get rid of to create desk space.
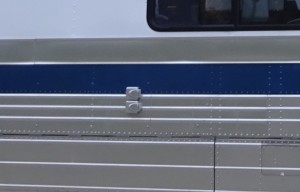
But removing the furnace left two round holes in the side of the bus from where the vents had been.
We covered the holes with tape, and kept hoping they would just magically go away. They never did.
Fixing the holes would require either welding in new aluminum skin, or replacing the impacted body panels all together. Both options were major projects we really didn’t want to tackle – so how about making the holes functional instead?
Master Tech tracked down solar power jack covers by Furron that fit the holes nicely, and painted them to match the bus – vastly improving the look.
We’ll eventually add in some power outlets behind each cover to actually make the covers useful too.
Manufacturers: There’s a market for useful ‘things’ that can fit in old standard RV appliance holes as folks upgrade their RV systems. Tracking downs something to plug these holes should not have been so hard!
Hatches
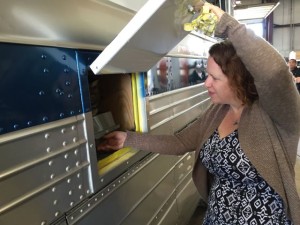
We have two hatches on the driver’s side of the bus – one covering the hot water heater and the other the lower fridge vent.
Both looked like crap with looks that would not fit in on a newly painted bus.
For the hot water hatch, we made the decision to ditch our standard RV 10 gallon Suburban hot water heater and go with a new hydronic systems (see below) – and to turn the space into a litterbox room for Kiki.
For the fridge – we just needed something new that looked good.
Master Tech found a local door manufacturer to make two hatch doors for us to replace the old ones.
After they were both painted to match the bus, they looked great.
September 2016 Update: Hatches look great and like they belong. But since they don’t stay open on their own and they’re a bit difficult to open, we don’t use the cat door like we thought, and tend to clean her litter box from inside anyway.
Fridge Vent Antenna ‘Hat’
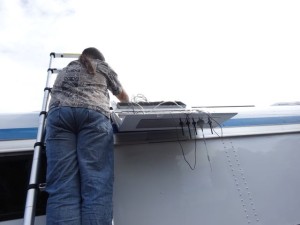
We’ve never liked the look of the top fridge vent – it stuck out like a sore thumb right along the curve of the roof line.
So we presented a challenge to Tim – design something that looked nice, and which would actually increase our functionality.
What we came up with is what we’ve come to affectionally call the ‘The Hat’… and it’s been one of our secret projects.
The new vent lid is on a hinge, to give us easy access to all of the conduit we’ve run behind the fridge – all of our antenna, air conditioner, and solar wiring runs through here.
And, the hat Has been designed to be a magnetic ground plane to attach all of our various antennas we’re constantly testing out – making it a lot easier to swap out antennas currently under test.
We’re super happy with the results!
September 2016: This thing is so fricken awesome. It looks awesome and so functional for our use. We’ve swapped out antennas several times in the past year (as part of our review testing of products over at RVMobileInternet.com)
Air Conditioners
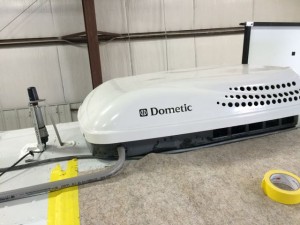
Our bus came with two circa 1989 Dometic Penguin Duo Therms. They cranked along nicely for years, but they were showing their age cosmetically and functionally.
One had died on us during our engine rebuild 2 summers ago, and we installed a new Coleman Mach 8 as a quick replacement. Unfortunately, that thing was so fricken loud we dreaded ever running it.
We had purchased a fan conversion kit to hopefully help reduce the noise, intending to install it while the bus was being put back together after being painted.
But once we saw some of the NEW shiny Dometic Penguin 2 models on other coaches in the shop – we just couldn’t resist.
Why have a brand new paint job, then put a mis-matched set of air conditioners back on the roof – one of which sounded like a jet engine, and the other which was 25 years old?
Our Dometic contact made us a sweet dealer price offer, and it was a done deal. Since putting A/Cs back on was part of the re-painting project – there was no additional installation cost.
We put a 13,500 btu unit in the back bedroom and a 15,000 btu unit in the front – both basic units without heat pumps.
A nice bonus – these new units can be controlled by wall mounted thermostats, which can also control our new hydronic heating.
September 2016: Thankfully, we haven’t needed these all that much since we try to avoid warm weather. But they do work well. Definitely quieter than the Mach 8, probably a bit louder than the old Penguins, but not much (again, hard to measure head to head when they’re not installed side by side). The air flow doesn’t seem to be as strong/directional as the old Penguin – we used to be able to leave the rear air on and have it directed into the front of the bus. And that’s all we needed. More experiments come warm weather. But they look marvelous on our roof. So glad we did the upgrade.
We find the wall mounted thermostats a bit.. frustrating.. to use. They’re easy to bump into and accidentally turn on and they’re not backlight so changing settings in the dark is difficult.
*Whew* That’s a lot of projects on the outside. Anyone else need a nap after all that??
Ok.. moving along to the basement of the bus…
Bay ‘Mechanical’ Projects
Precision Temp TwinTemp Jr Hydronics
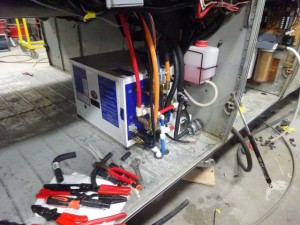
Since we decided to remove our old hot water heater to make a bathroom for the cat, and we had already ripped out our furnace many years ago – we really needed something new to handle these key tasks.
We thought about an on demand hot water heater (like the Truma) and continuing with an electric space heater and a Mr Buddy portable propane heater. But we’ve always had our eyes on hydronics – typically a diesel burner that heats coolant and water to provide radiant heating, hot water, and engine pre-warming.
We always thought ‘one day’ we’d go with a system like an AquaHot or Oasis, but the complexity, expense, and maintenance required put us off.
Thanks to a couple of trusted friends – the Snowmads and our friend Kasey of KC Custom Coaches – Precision Temp ended up on our radar.
It sounded awesome – much cheaper than Aquahot with a lot of advantages, super quiet, and it requires little maintenance.
But the catch? It’s propane, not diesel.
We had no propane on board, and really wanted to minimize fuel sources and stick to diesel.
But after talking with Precision Temp, we were won over…
And we gotta say, so far – it’s complete love.
We’ll do a dedicated article on hydronics, the Precision Temp Jr., our reasons for choosing it and installation costs at some point in the future.
Report on the new hydronics from a boondocking perspective: Earning Our Abundant Boondocking’ Merit Badge: Bus Renovation Report
July 2016 Update: We experienced much higher than expected propane usage when the unit is in ‘winter mode’ (which keeps the coolant heated for furnace use). We’ve been working on tracking down sources of heat loss, adding insulation around pipes and installing valves to prevent heat loss into places like the engine from the pre-warming loop (don’t need it all the time). The hunt continues, and we suspect it’s the loop we installed into the bus’ over the air heating element in the front.
Having now run the unit in ‘summer mode’ (with the house heat turned off), propane usage has been super minimal. We use the unit just for heating the water and engine pre-heating on chilly mornings.
Overall, we love the functionality of the systems – ‘central’ heat is pretty snazzy, and pretty quick hot water is too. We also love the direct ‘Hot Tap’ off the system to faucet in the sink for brewing hot tea and coffee with.
A year later, this upgrade mades our ‘Top 5 List of Favorite Upgrades’.
Generator & Air Compressor
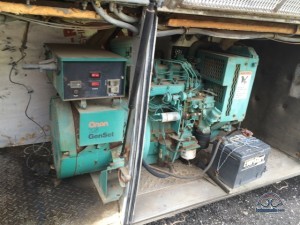
Our bus came with a vintage 1980’s 7500w Onan diesel generator that had few hours on it, but which looked older than its age, and which was in need of an overhaul.
It was never properly setup to be sound proofed for RV installation either, making it horrendously loud in use.
It was also WAY overpowered for our needs.
Suffice it to say, we’ve been wanting to ditch that anchor for quite a while.
We’re just not ‘generator people’.
We’ve had one onboard since our Oliver Travel Trailer (2008), and really don’t use them all that much.
We prefer to design our needs around running off battery, solar, recharging while underway, and seeking out hook-ups when the weather turns inclement enough to need a generator for long.
But we weren’t quite ready to be completely without a generator on board, just in case.
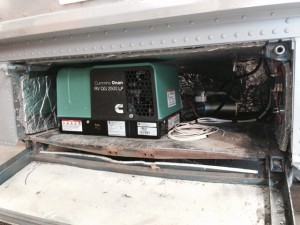
So after much thought – we decided to “upgrade” from a 7500W diesel generator to a 2500W Onan propane generator.
We took advantage of going to a physically much smaller generator by installing it in the otherwise unusable spare tire bay, which is hidden behind the front bumper – freeing up the old large generator bay for storage.
We also installed a Viair 450C air compressor in the same bay, which allows us to air up the bus without turning on the engine – which makes our get-a-ways less noisy – and allows us to resettle the bus if our air suspension ever settles unlevel.
We’ll do a much longer post in the future about the generator, why we went propane, and how we can get so much capability out of such a small generator.
Yes – we CAN run our big front AC on it!
July 2016 Update: The generator works great, runs everything we need it to, and can charge up our batteries on cloudy days. We do need to further work on reducing the noise, the installation is a bit rattly – one of the pitfalls of not having ‘tweak’ time after the renovations at the shop.
We published a dedicated post on the generator (and air compressor):
Big RV: Little Generator – Downsizing to a 2500W Propane Generator
Propane Systems
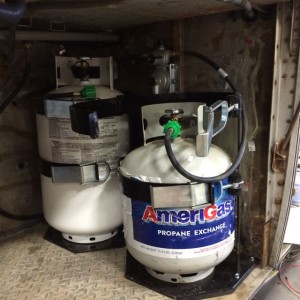
Of course, the two modifications above required re-installing propane in our formerly propane-free bus.
We installed a 20 lb and 30 lb tank in the former generator bay, which is accessible and very well vented.
The combo of tank sizes makes them easy to transport for refills, or even taking advantage of common cylinder exchanges.
September 2016: Due to the excess propane usage, we actually added a second 30 lb tank, and keep the 20 lb as a back-up pretty quickly. Overall, having propane back on board has been no big deal, especially in ‘summer mode’.
All New Plumbing?!?
Plumbing projects weren’t on our master task list when we pulled into Master Tech – except for replacing our balky dump valves.
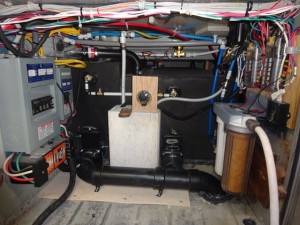
But by the time we left (maybe we’ll tell the full story in a future post), we ended up with all new (larger) holding tanks, all of our plumbing lines replaced, a SeeLevel tank level monitoring system installed, and essentially a completely redesigned and fully re-plumbed water and waste system.
We also added a cold water return, to reduce water waste when waiting for a hot shower water. And we put in a black and grey tank flushing system too.
And we can also even fill our tanks by sucking in water from non-pressurized sources.
Overall, the improvements will serve us very well – we now have 112G of fresh water, 120G of grey and 70G of black capacity that will give us seemingly infinite boondocking and dry camping capability.
But the costs of this upgrade in the end came out more than we were led to expect at each decision point (over $6000!!).
We’re chalking it up to ‘project creep’ which I’ll wash away with a few long showers… because, well, I can now.
January 2016 Update: Ahhh.. did I mention long showers? And the cool water return ROCKS. And gotta admit, we feel like a legit RV now with a properly set up plumbing system.
Report on the new water systems from a boondocking perspective:
Earning Our Abundant Boondocking’ Merit Badge: Bus Renovation Report
A year later, this upgrade mades our ‘Top 5 List of Favorite Upgrades’.
Hinges
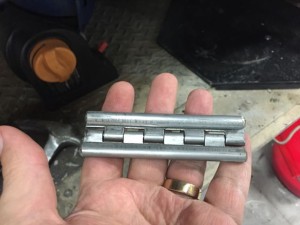
Our style of bus came with rubber bay door hinges. They’re pretty cool, but tend to age and crack over time, requiring replacement every few years.
It’s quite a chore to remove the doors and put new hinges on – so we sought out a steel hinge replacement kit. We found them via the various bus conversion communities we hang out in (www.busconversions.com) and sold via an individual we got in contact with there.
It was pricey upfront ($442 worth of parts) and very labor intensive – but the upgraded hinges should last for decades.
September 2016 Update: It’s been so nice to not worry about cracking rubber hinge doors, or wearing them out by leaving doors open for a bit. They look great, and overall we’re really happy with the upgrade.
Interior Projects
Before Pictures
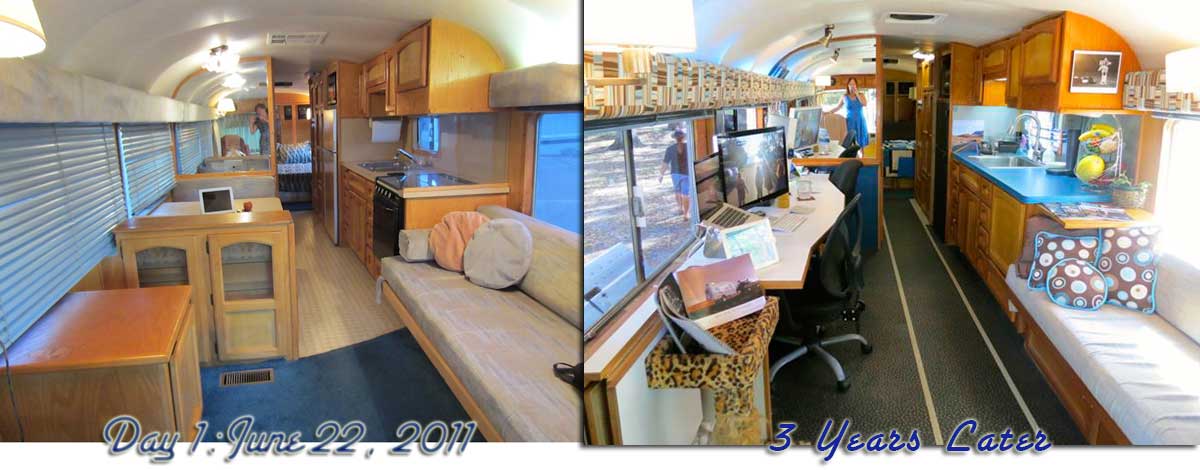
When we shopped for our bus, we looked for something livable from day 1 that we could work on over time.
Zephyr’s original conversion interior, while 20+ years old, was in great shape and a fantastic foundation to work from.
Below is the Day 1 photo, followed by essentially what the interior was like when we pulled into Master Tech back in May:
MCD Shades & Curtains
When we were bus shopping, we vowed to rip out any mini blinds that we might find in our eventual home.
In our experience, mini blinds only provide an illusion of privacy. Until we met Zephyr that is – and her actually amazingly attractive and functional ‘Tiffany Tilt’ blinds.
When closed, they actually pleat to create total privacy. We’ve never seen them anywhere else, no one sells replacements, and some of ours were broken and needed to be re-strung.
When we pulled into Master Tech, that’s all we intended.
But Tim at Master Tech started talking to us about the joys of MCD day/night shades.
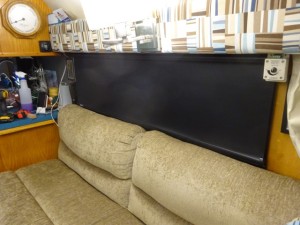
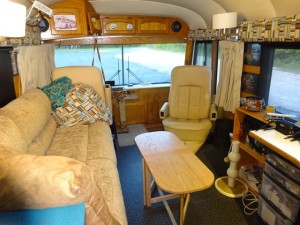
We were quite unsure about them – would they look ok & provide privacy without a side valance, like they’re typically intended for? Tim assured us they would. And that our front windshield could have them too. Heck, all the windows could!
We eventually signed on for having the front windshield done with just a day shade (we kept a front pull curtains for many reasons – and Master Tech found us some take-outs from another coach we could modify to replace our shredded old curtains), and MCD day/night shades for the front living room windows.
When the MCD shades came in, they were awful. They were not attractive, hung down much lower than anticipated with the rolls being way too visible – and most critically, they were mis-measured and not wide enough to give any privacy without a side valence.
We contemplated just re-installing our old dirty icky blinds – the new MCDs actually felt like a big step back.
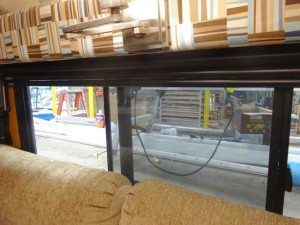
But we ended up re-ordering (Master Tech covered this for the mis-measurement error) – and decided to switch to all black to minimize the look of the rolls.
The new blinds came in wide enough to overlap the windows, and we went from absolutely hating the shades to now totally loving them. We think this will be an upgrade we appreciate for the long term.. and the black looks downright contemporary in our living room.
As a bonus, Master Tech made as a pull down movie screen for our projector out of MCD hardware, using our spare projector screen fabric.
Sweet!
We paid full retail price for the shades -$1695. Master Tech then charges $95 PER shade to install, which they had not made clear to us when they gave us the initial quote. Because of this, they did ultimately end up dropping the installation price down a bit when we questioned them on it.
The front shade installation was surprisingly pricey too – requiring some custom woodwork that wasn’t nearly as simple as we initially were led to believe.
September 2016 Update: Totally loving the shades. The windshield shade looks so much better than our suction cup solution, and so much easier. Love that it doubles as a visor while driving too. On the windows, some of the metal bar pulls have scratched up a bit. And with black screens and black shades that look the same after dark inside, we do sometimes ‘forget’ the shades aren’t down at night… (oops, sorry neighbors, hope you enjoyed the show). Do wish we had swapped out the smaller kitchen & bath white shades (which were measured correctly) for black so they matched. Overall tho, definitely a worthwhile upgrade.
A year later, the shades are holding up well to our regular use – although we do need to go and tweak a couple of them because their acting a bit sluggish.
Kiki Areas – Desk & Litterbox Chamber
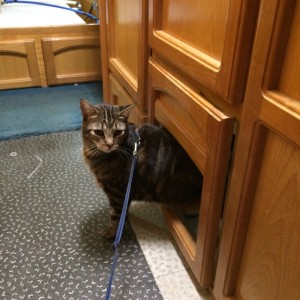
Most of our projects really come down to the cat – and a lot of the projects were slippery slopes starting with wanting to create her a private litterbox room.
Previously, the box was stored under the steering wheel while stopped.. which being right at the top of the steps as you entered the bus, was less than ideal.
Now, Kiki’s box is in her own chamber in the hallway where the hot water heater once was – and we constructed an aluminum vent to the roof with a fan the sucks all the icky cat smells out. (Do we have the first ever cat poop vent fan in an RV??)
The driver’s area of course remains hers. Her robotic cat food feeder resides there now, and we moved her cat perch (ie. ‘desk’) there too. Now, when we enter the bus we have to scratch her cute fuzzy head. That’s an upgrade we love!
(I wonder how long it will be before she starts charging a toll for us to enter the bus?)
January 2016: Kiki wrote a post telling about her potty room, and even how she decorated it.
A year later, this upgrade mades our ‘Top 5 List of Favorite Upgrades’.
New Sofa & Mattress
On our way into Elkhart, Lippert Components reached out to ask us if we’d like a new sofa and a Denver RV Euro Top Supreme Mattress.
Umm. Maybe?
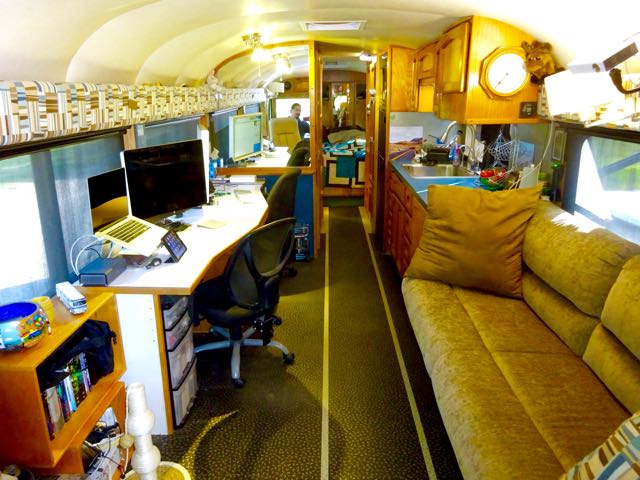
We didn’t think a new sofa would work with the way our living room was designed, but we were open to seeing what was possible. And we were ready to toss our mattress (a gel memory foam we bought just 2 years ago) – as it had developed quite the cave in the middle.
We were able to stop in one of Lippert’s facilities and test these things out in person – and decided, heck, they certainly couldn’t be worse than what we had.
We gotta say, the Thomas Payne Jack Knife sofa is such a HUGE improvement over our old basic goucho pull out!
It’s totally transformed our living room from something we kinda forgot was there, to something we’re finding ourselves using almost daily. It didn’t require too many modifications to our platform to install, and it looks fantastic.
It’s also totally comfortable both for sitting, and curling up together to watch a movie on our new projector screen – or a lunar eclipse out our new windows.
September 2016 mattress update: The mattress… well, Denver Mattress replaced it once under warranty for us in late October. They were accommodating to work with to match our travel schedule to arrange to swap it out at one of their stores. After a couple of weeks of use on each mattress, we felt it ‘gave way’ too much. We tend to start the night spooning with a cat on top of us, which seemed to be too much weight for the mattress to support (you may have noticed, we’re not exactly small framed people… but we’re sure it was the cat that pushed it over the edge 😉 ). The indentation left then would cause a good portion of the mattress to not be flat or comfortable for the rest of the night. After 4 months of trying two different mattresses out, we gifted it on.
Since the beginning of the year, we have been auditioning internet only mattresses. We order one online, it gets delivered and if we don’t like it in the first 100 days they fully refund us and send someone local to where we are to pick it up. Super convenient setup for RVers on the move.
We started with a Leesa in January. It turned out to be too firm for us. So we exchanged it for a Purple in May. It was pretty awful (it just feels ‘weird’ – you can really feel the grid of purple stuff). In August, we had Helix custom make us a mattress (you fill out a form in advance) – and so far, so good.
After we’ve found our ideal mattress, we may do a general ‘Do you need a RV Mattress?’ report and talk about our evolution of mattresses over the years.
September 2016 Sofa update: Still absolutely loving the sofa, and so far it’s holding up well to the trials of daily life. Crazy how we almost didn’t accept the offer for the couch, and how much it has transformed our space. It’s like we added an extra 5′ of usable space to our bus with the living room transformations overall.
Our Living Room Overview Post: How We Added 5 Feet to Our RV — Without Adding Slides
A year later, our living room upgrade made our ‘Top 5 List of Favorite Upgrades’.
Bookshelves
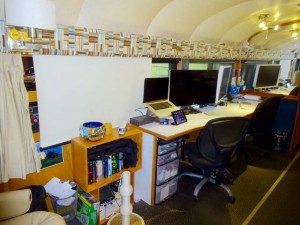
Our fresh water tanks are stored under our bed, and making them larger (88G -> 112G) required some modifications.
One was removing the three drawers that opened at the foot of the bed, and making that space into an open cabinet.
We repurposed the drawers as cubbies to make a little bookshelf in the living room. We’re really digging it – and the wood is of course a perfect match.
Light Fixtures
We have two new 12v light fixtures added during the renovation.
One is a 3 light fixture above our desk space that totally looks sweet in our living room. The fixture was picked out at Lowes, installed with a pull switch chain, and then we swapped out the conventional 110V AC bulbs for 12V LED bulbs in it.
In the bathroom, Master Tech helped us find a 12V fixture that looks very sweet in there. We previously only had 110V lighting in the bathroom, which meant peeing in the dark while boondocking with the inverter off.
January 2016 Update: Loving the lighting. We loved the desk light so much that we bought two more to replace the dorky lamp shapes in the living room, and installed them on the valence,
Control Panel & Electronics
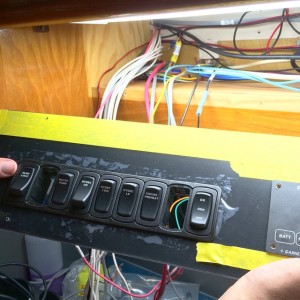
We completely re-did the area over the sink to create an RV dashboard and control panel.
This is where the switches that control the water pump and hydronic system live, as well as the remote start control for the generator. We also mounted the SeeLevel tank monitor here, and our Victron BMV-702 battery monitor.
It not only looks super snazzy, the panel is very functional.
While we were at it – we also redid the bank of switches next to the driver in a matching style, and installed our new GPS system (a Garmin 660LMT) with backup camera and TPMS system by EezTire.
So far, we’re very impressed by both.
We’ll eventually be writing a lot more about all these upgrades.
Bathroom
We used to have a Sealand toilet that was getting a little worn out. Mainly, it was getting impossible to keep clean after years of use.
Dometic offered to replace it for us, and recommended their 320 residential style model. The bowl is elongated and deep, and can actually fit standard toilet seats. It’s of course ceramic, and has their new style seals that can be changed from the top – making that eventual chore a LOT less painful.
For as much as one can ‘enjoy’ a toilet, we gotta say – this has been one sweet upgrade! We’re still adjusting to the foot pedal being on the right – whereas our old one was on the left.
September 2016: The toilet is holding up well, but we’re finding it extraordinarily difficult to obtain replacement seals. They’re not commonly stocked, and when you do find them they seem quite pricey. We even tried to get one from our Dometic contact, and they botched the order up so badly that instead of sending us a new seal – then sent us an entire new toilet (they didn’t want it back either, so we gifted it to someone who needed it.)
Whew. Maybe I should have just stuck to just the video tour. That was a lot of words!
But, it does really bring home just how large of a renovation project this was – and there were other small little projects tackled too that didn’t even make this list.
We are excited to have so many awesome upgrades that will serve us well for many years to come, increasing our quality of life every single day. We’re certainly enjoying each them.
So, there’s the nickel tour.
If you feel so inclined to leave a few nickels behind, there’s a ‘Leave a Tip’ button on the bottom of every page of our blog. 🙂
Bus Renovation Progress Reports from the Summer 2015:
One Year Later: Bus Renovation Recap — Our 5 Favorite Upgrades
Zephyr’s Summer 2015 Renovation Hit List — the original project list, including our decision points for various items (such as why we’re going propane and not diesel on the hydronics & generator).
- Bus Renovation Progress Report: A Riveting Tale of Why We’re Way Behind Schedule — Our first report onsite back in Elkhart.
- Bus Renovation Progress Report #2: Week of August 17 — Getting the project back on track.
- Bus Renovation Progress Report #3: Roller Coaster Week — August 22-27 —
- Bus Renovation Progress Report #4: The Paint Job! (August 27- Sept 2)
- Bus Renovation Progress Report #5: Con-Du-It Attitude (Sept 3-9)
- Bus Progress Report #6: The HOME Stretch! (September 10-16)
All about our Bus — A little history on our bus from start to now.
Is It Worth it to Renovate?
So, if we put so much effort into a 54 year old bus.. wouldn’t it have been easier/cheaper to just buy a newer coach to get all these bells & whistles?
We tackled this question in this post…
Is It Worthwhile to Renovate and Old RV? Why Not Just Buy New?


1) I’ve considered buying a 35’ bus but have been concerned about how big the showers usually are, I.e. too small. What are the dimensions of yours?
2) Thank-you for taking the time to put together such an insightful blog and sharing your lifestyles with the public.
3) We live outside Amarillo. I noticed you’re getting ready to head to Texas. Will you be around here?
Dennis McCrea
Panhandle, TX
The advantage of a bus conversion is that you have the flexibility to design your layout however you like. Don’t know our shower dimensions off the top of my head (not currently on the bus), but it’s very comfortable for us.
Won’t be making it west of Austin this year.
Just discovered you on the tube……you guys are great. Have been following the Winns for a long time. You mentioned all the high line buses/Motorhomes, just wondering why you didn’t decide on a Blubird. No I haven’t seen many for 8K but they are so well built and some nice ones out there for waaaaay under 100K+. Also, wonder what your business is. I know it sill takes $$$ to live on the road as well. Also why would you prefer a 30 foot rather than a 35 ft. Just for maneuverability? I am looking at a 90 BB …but now you’ve got me thinking. Thanks for taking my question. PS Why do I think of Bette Midler when see you guys? Great videos.
Hey there.. Bluebirds were on our short list of coaches, but it just happened that a GM found us first. They’re also very tightly integrated, making modifications more difficult (we knew we’d want to modernize). Ours is 35′, not 30′. 30′ would have been more ideal for us, but buses just don’t come that short. You can read up more about our bus journey (and shopping considerations) at https://www.technomadia.com/zephyr.
And learn more about us and our income on the road at https://www.technomadia.com/about-us
Wow! Thanks for sharing your upgrade. You have ended up with an RV that is much better than anything new. Beautiful! I know you like to travel in the temperate zone…. AND, if needed, can you go to areas below freezing? How cold did you design for… Are the relevant bays heated and temperature tracked? This is a question from a Maine guy where we have already had hard freezes and the leaves are past peak color now.
Our main cargo bay and plumbing bay are tied into the hydronic heating system, and will be automatically kept above freezing when the heat in the bus is on.
As for how cold can we go… Our bus is well insulated, and even more so now that we have double-pane windows. I imagine we can handle pretty low temperatures comfortably, but we aren’t eager to push those limits just yet. But being able to handle cold nights that drop into the 20’s without worry will be awesome.
– Chris
Awesome upgrades!! I just found you guys thanks to youtube and I’m so glad I did, you are so inspiring! I’ll be keeping up with you for sure!
Find me at: RedheadedOwl.com
Thanks for the upgrade video! Your “new” home looks great!
Very interesting. Like the hydronics, never heard of that system, will definitely have to read your post on that. Like the cold water return, too. I can sure relate to the frustrations over extra and undisclosed costs, with all the truck repairs I’ve had this year. Finally got a new (used) one. Also the agony of the wait to move back in. Oh, of course, I love Kiki’s powder room and desk!
Awesome tour! Kiki has it made with her special upgrades and you two are amazing the things you got done and following along on FB I realize just how challenging that was!
I like your video tour on your motorcoach but I’ve got comment on your hot water system.
I went to aqua hot plant here in Colorado where they build there systems model 675d , engine heat,3 zone baseboard register , and it runs on 12 volt . Thanks for the info
Thanks for the information. I’ve been curious about the whole upgrade project(s) and look forward to reading more about it all. Great post!
Thanks for taking the time to sate our curiosity about all your amazing upgrades! Everything looks wonderful 🙂
Chris and Cherie,
Thank you so very much for sharing your bus renovation with us. I can understand why the upgrades were so complex, particularly on a vintage bus. Great job on the video, too! If it matters, I really don’t need to know how much all of this cost you. It’s a personal thing. I’m just grateful to see the end result. Thanks again. Chris http://www.cuontheroad.net and http://www.facebook.com/groups/rvhappiness/
Thanks… we know that there are a mix of folks who don’t care about the costs, and we have others who are asking for specifics. We’ll find a balance to share in a way that feels right to us.
Thanks for sharing. It’s just beautiful and I’m looking forward to seeing future videos with more info/details! I hadn’t heard about the stylized “C”s before. Since Chris was on the road first, I always assumed it started out as his logo. I interpreted it as the stylized top of his face–glasses and high forehead, which I always thought was very creative. But I like the integrated two Cs better.
Have a great trip at the Balloon Festival. Love your videos and blog.
Thanks for a summary tour of the upgrades. Your bus is a little bit too much for me to relate to (Currently converting a 1995 Dodge Van into a living space), but there are definitely some aesthetic and functional ideas that I’ll tuck away for the future.
Love what you have done..It is beautiful.
Bus looks great, you can be proud.
Hi C&C,
Reading this through and watching the video I can understand why you were both so frazzled and concerned about getting on the road to make your trip. Zephyr must have looked like an overturned box of lego until very close to the end!!
Anyway, all I can say is “Wow!! It was really worth it. Zephyr looks as good as any lovingly refurbished vehicle I’ve ever seen. Congratulations guys!! Truly awesome design, fit & finish. Well done!”
I’m really looking forward to the Old v New webcast.
Aww.. thanks. Yes, the end results totally worth it..and indeed, the process getting there was quite overwhelming.
Thank you for sharing, both the ups and the downs, the successes and the “not quite successes”. So many just talk about this in terms of the good, and that it is all easy. I like the “keeping it real” style. Thank you also for sharing some of the quotes. It really is helpful when us dreamers dream of doing some type of conversion, or even upgrading stock components, to know some of this information going in. Zephyr looks awesome, all the projects look great, and I bet you feel like you are living in a new house! Enjoy your travels.
Thanks.. really appreciate hearing the ‘keeping it real’ style is valued. We strive for balance here, and not sugar coating things while keeping a positive attitude.
The renovation looks great, guys! Very significant upgrades, and something to be very proud of and enjoy for many years to come.
The reno looks great. Love the cat litter box, great idea! It’s great that as time goes on the good is what is seen! Glad you both look much more relaxed and happy.
Congrats! Quite the ordeal but the results are very nice. I really dig the litter box set up. You should patent it and collect royalties. We had hydronic heat in a mountain cabin we used to own. It was soooo nice in the winter when rolling out of bed to have warm floors to walk on.
So with the all the mods and upgrades, is there a new electrical consumption audit in the works?
Yes, we will indeed need to update some of our electrical audit numbers… but first.. a few more naps 🙂
Thanks for the tour CnC! Your new digs look fantastic, and us geeky types really appreciate seeing and hearing so much detail about the various new systems. It’s great to see you two back in your element and en route to ALB. Safe travels, and have a blast down there!
FANTASTIC!!!
Awesome video seeing and hearing about all the upgrades you’ve made. This really helps get a grasp on the magnitude of the project over the summer. You’ve accomplished a lot! And it’s gotta make living noticeably more enjoyable with all of the upgrades. Plus all of the benefits of greatly improved off grid living opportunities.
A job well done indeed! Congratulations! 🙂
It’s like living in a whole new bus 🙂
Great upgrades you guys, it gave me some ideas of things to look for as well. Thanks for sharing, I bet you guys are really HAPPY campers now. Safe Travels
How would you describe the noise levels of the new air conditioners? The smaller one any quieter than the bigger one? The ole bus looking pretty good.
The noise level is comparable with the original Penguins we had. Loud, as any roof air is (but not nearly as loud as the Coleman Mach 8 was).. but not intolerable. We can actually hear ourselves think, but still try to avoid situations where we actually need them for long. Don’t really notice much of a difference between the two.
Very nice !!!
Well done! Very thoughtful alterations and repurposing. The scheduling issues notwithstanding, MasterTech provides a high level of craftsmanship and a keen sense of utilization in their designs.
Indeed… the quality of their work, their innovation and confidence in taking on challenging projects we were never in question of. All of our frustrations are around the expectation setting with scheduling, project management and costs.
The work done, we are extremely pleased with.
The video link says “this video is private.” I checked for it on your YouTube channel but it doesn’t appear there yet. 🙁
Congratulations on getting through the tunnel and back out into the light, where you can enjoy all those upgrades. Zephyr looks sweet!
Ooops… thanks. I’ve got the video available again.
Yay, works now. Whew, what a massive project. I can see why you stuck with MasterTech. Lots of creative and resourceful things that they accomplished. Enjoy all those enhancements!
Oh my, I am numb just reading about your renovation. I sure am glad you like it. Thanks for all your work putting this post together. I do have a question about storage space. Did you gain any storage space? It seems like all the new gadgets need space for their controls, etc. I like ‘toys’ but always have a problem finding space.
We actually did gain storage space – the old generator bay now stores lots of engine parts and outdoor stuff that used to be in another bay. We have an entire bay open now, that will eventually be for folding bicycles 🙂 Also, since we had to move almost everything out, we ended up purging a LOT of stuff we weren’t using.