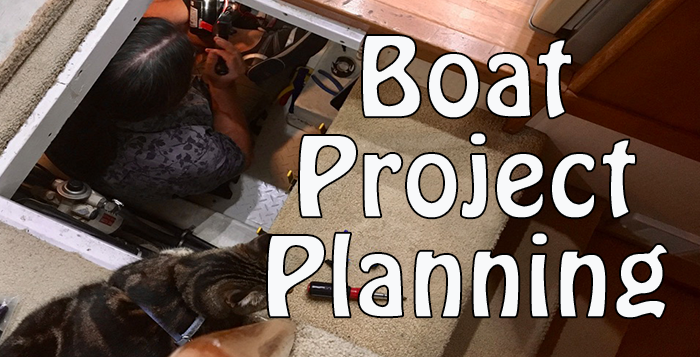
Boat’s are all about projects.
Whether it is fixing things, upgrading things, modifying things, or the ever constant need to maintain things – the project list on a boat is perpetually long, and seemingly endless.
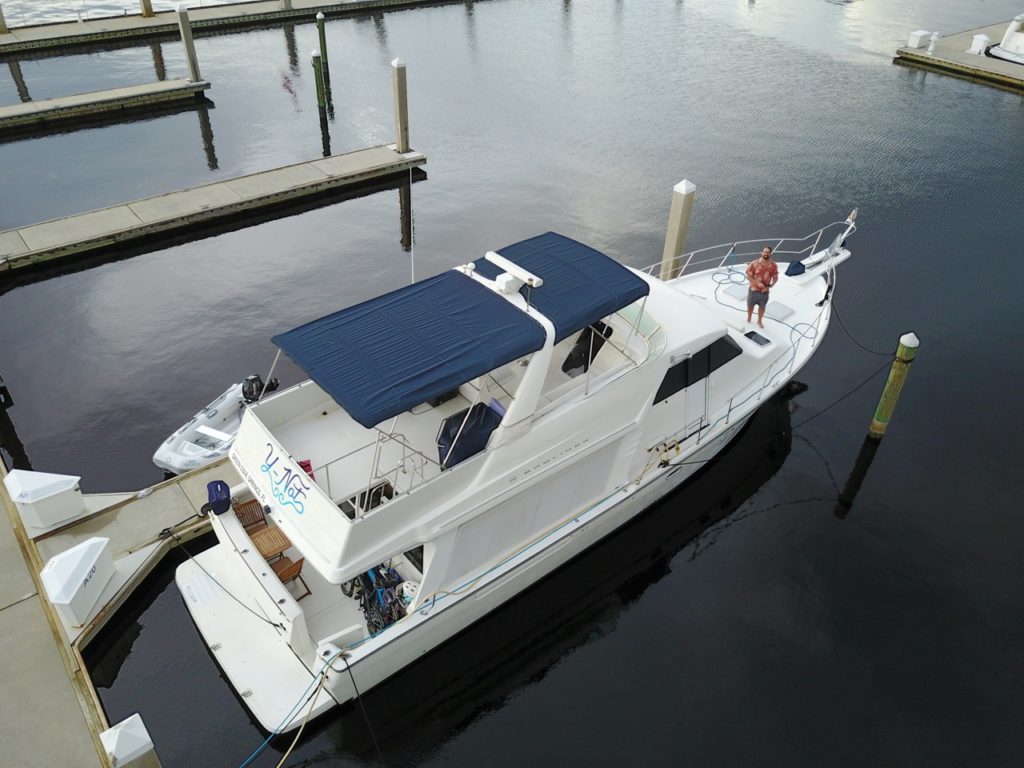
Particularly as new boat owners – we have a nearly overwhelming list of things that we would like to tackle to make Y-Not our ideal home on water.
Here’s a run-down of some of the bigger projects on our radar (including, ironically, radar) – and a recap of a few of the projects that we have already completed.
NOTE: This post serves as a filing place for our own notes on our Bayliner 4788 projects, but we thought some might like to follow along too!
Video Version
For those that prefer video to text, here’s the updated tour of Y-Not – featuring our thoughts on the various upgrades we plan to tackle:
Completed Projects
The past few months have been busy aboard, and we have tackled some projects both big and small:
Window Sun Shades
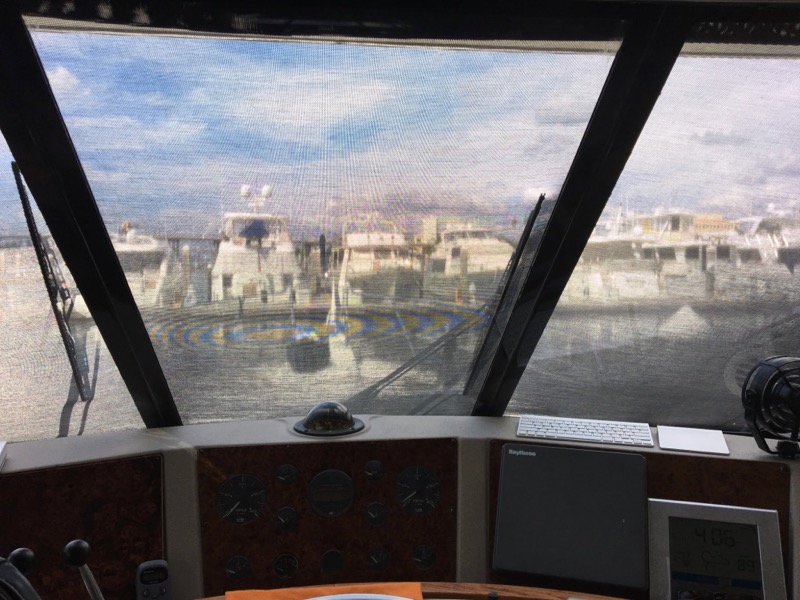
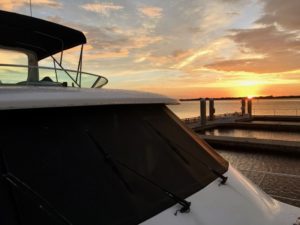
Y-Not came with canvas pilothouse window coverings that soaked up heat and completely blocked any view from inside, leaving the pilothouse either a roasting sauna with the covers off, or a dark (but still hot) cave with them on.
One of the first projects we tackled while in Fort Myers was hiring Scotties Canvas and Marine to redo our pilothouse window covers with a black see-through Awntex Black-160 material that lets in light but blocks most of the heat.
Scotties also installed snaps so that we could attach the prior owner’s white sunshades over the salon windows.
The overall results look great, and have transformed both living areas – keeping the heat out, the views open, and giving us privacy galore during the day.
Cost: $1085
Convection Microwave & Induction Cooktop
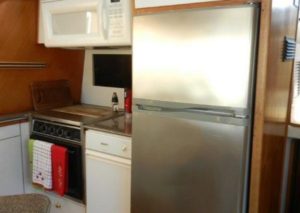
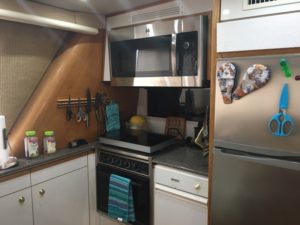
We replaced the basic white conventional microwave with a stainless steel GE Profile Convection Microwave, a huge upgrade in both looks and functionality. Except for some very tight maneuvering to hang it from above, it was a drop in replacement.
We also purchased a True Induction MD-2B Mini Duo double burner induction cooktop. (We’ve used induction in the bus for years, and love it!)
These two upgrades pave the way for us removing the old Princess Electric Range in the future, turning that space into a cabinet, insetting the induction cooktop at counter level.
Incidentally, the white thing next to the oven is a trash compactor that was standard on the Bayliner 4788. We didn’t originally think we’d keep it – but we’ve come to absolutely adore it. No now have no worries about where to store trash while anchored out, we so wish we had room for one in the bus for extended boondocking!
Cost: $299 (induction), $599 (microwave)
Cockpit Dining Upgrades
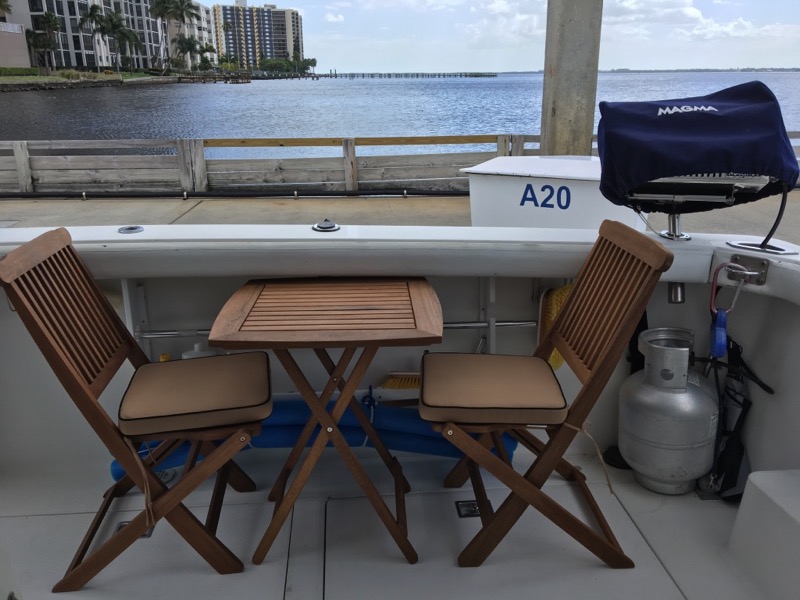
On the cockpit (ie. our back porch) – we’ve added in a lovely little wooden folding bistro table and a Magma Newport Infrared marine grill using the fishing rod mount.
(Grilling fish will be as close as we get to fishing ourselves!)
We’re using both frequently (when it’s not too hot or raining!) for cooking & dining outside with a fabulous view!
Cost: $179 (bistro), $430 (grill)
Salon Updates
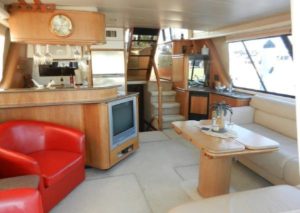
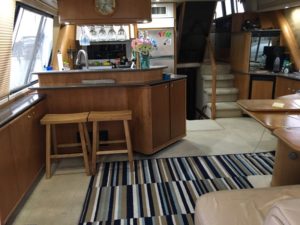
We immediately ditched the gigantic tube TV (aka spare anchor) and gave away the red barrel chairs in the salon when we moved aboard.
The chairs have now been replaced with bar stools.
The prior owner luckily found the original TV cabinet doors in his storage unit, and we managed to re-hang them to cover the hole.
Eventually we want to build in shelves here, and more permanently hang the doors.
We’ve also added a throw rug which keeps the engine hatches covered up, and makes the worn out carpet a little easier to live with until we can get around to replacement.
Cost: Rug – $35, Stools – Free (thanks, Mom!)
Full Initial Engine Service
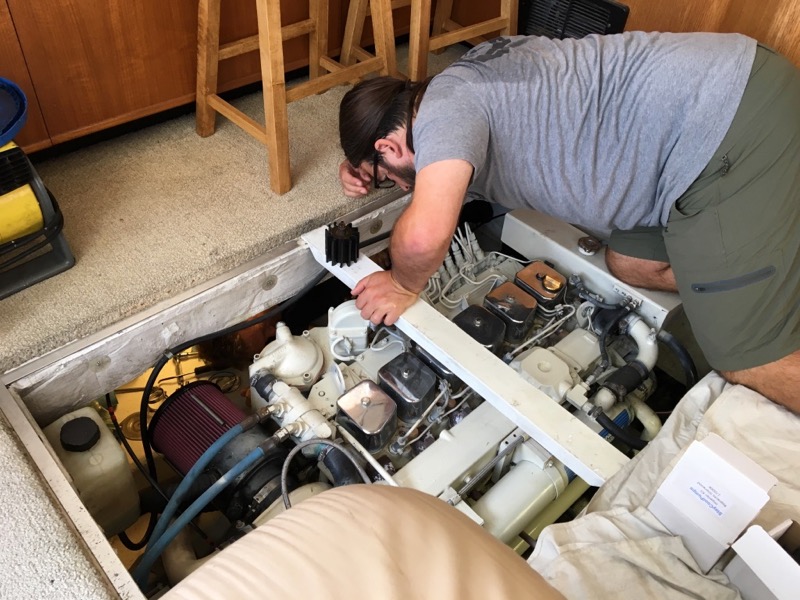
We hired local father and son mechanic team Rob & Sons to spend a day getting our engines (both main engines and the generator) fully serviced – oil, filters, coolant, impellers, anodes, and more.
But most importantly – they took the time to teach us every step of the way, so that we will have the confidence to handle future maintenance on our own.
The training alone was immensely valuable, and they took the time to answer every question we managed to come up with, even weeks after our service.
Aprox Cost: $2,000 (time & materials, including spares of everything)
Dinghy & Dinghy Davit
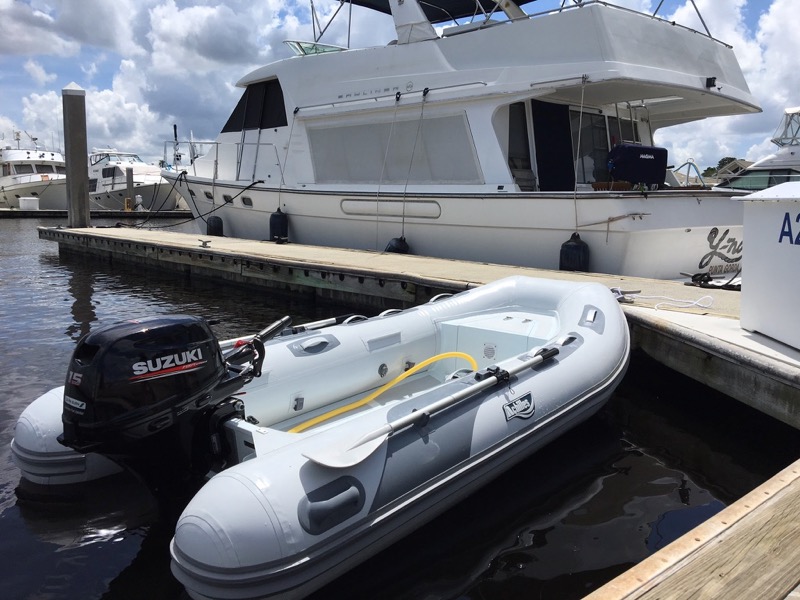
We now have a dinghy & motor (Achilles HB310-AX with a Suzuki 15HP engine), and our Dinghy Caddy davit system is on order and should be here soon.
Once we get the davit installed and tested out, we will do a more in depth post on all the components of our dinghy setup and why we made the decisions we did.
New Boat Graphics
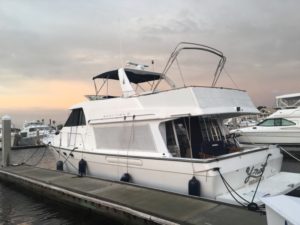
Though we knew from the start that we did not want to rename Y-Not, we absolutely wanted a new look.
To create this, we worked with our long-time partner at Upthentic Creative to design a new logo for the boat.
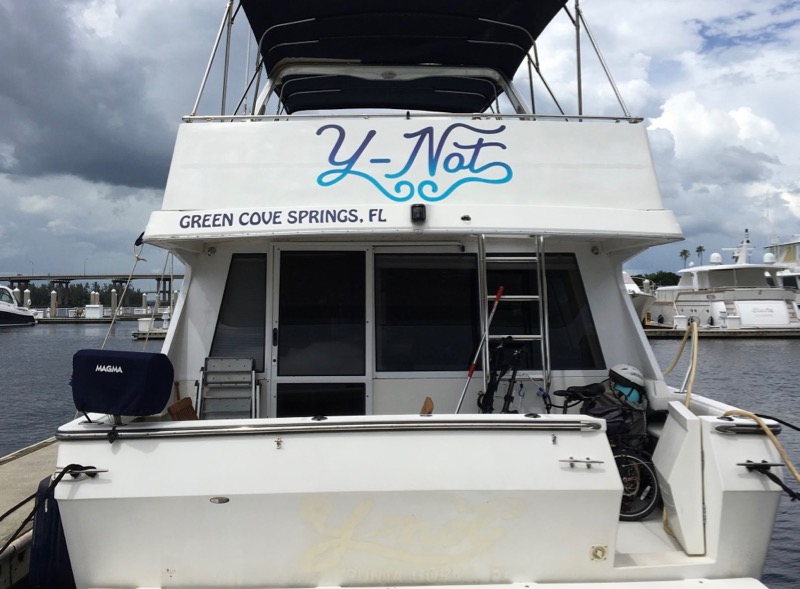
We wanted to incorporate the back-to-back C n C (for Chris and Cherie, of course!) that we’ve long used in the Technomadia logo – and we think it beautifully represents waves underneath the Y-Not name. We also wanted to play homage to the flow of the original logo, while departing from the name’s origins being ‘Tony’ spelled backwards (thus the capital N in ours.)
We had a local sign shop Sabal Signs print and install the new graphics and our new hailing port name of Green Cove Springs, FL.
According to Coast Guard regulations, we could have picked any City & State, as long as it’s a real place. We decided to use our domicile address of our mail forwarding service St. Brendan’s Isle – the only permanent address we’ve ever shared together. As many nomads use this service, we figured it would be a visual wink to our fellow cruisers.
The end result looks absolutely fabulous!
If you want to join in the fun, on Saturday morning we hosted an impromptu live ‘Re-Dedication’ ceremony on YouTube after the new graphics where installed.
Cost: Design: $375, Printing: $490 (including graphics & numbering for the dinghy, old decal removal & installation)
Repairs & Unplanned Upgrades
I like to think of unplanned repair this way…
Things don’t break – they just jump to the front of the upgrade list.
And we’ve had plenty of unplanned repairs and upgrades so far on board.
Here are a few of the more notable:
Rebuilt Ice-Maker
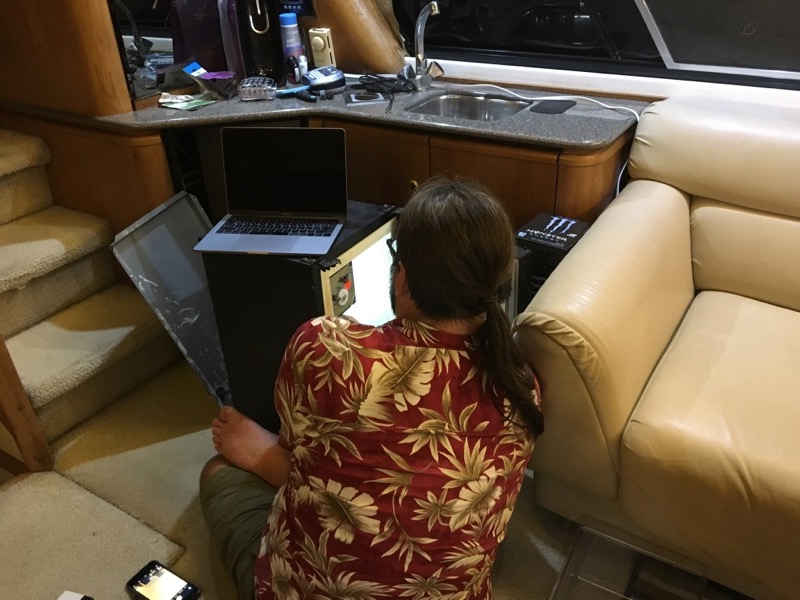
Soon after moving in we discovered that the standalone U-Line ice maker was leaking internally.
And when we looked closer into the problem, we discovered that the internal tray mechanism was covered in flaking off teflon that was shedding into every new batch of ice. Ick!
We ordered a rebuild kit to replace the core mechanism, fixed the leaks, and now we have an endless supply of ice – essential for surviving the summer heat.
Cost: $240
Kitchen Faucet Upgrade
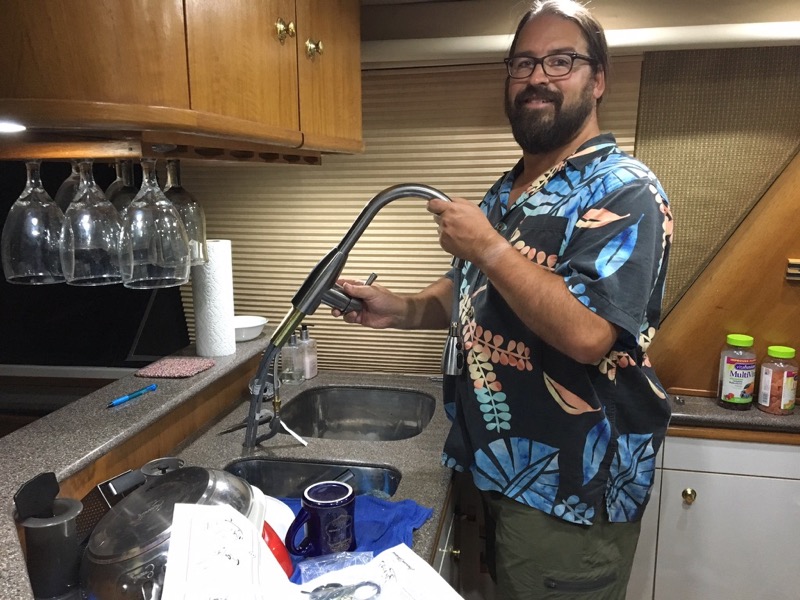
Another leak discovered shortly after moving in was the original Moen kitchen faucet, which turned into a nightmare to remove.
Rather than repair the old one, we took the opportunity to upgrade to a much nicer looking stainless design by American Standard (same model we installed in our bus.)
Cost: $129
Toilet Pump Rebuild
Our guest head has been balky since we first moved in, and the VacuFlush pump system is in an incredibly awkward location to work on.
We called local experts Fleet Repair and Marine (another awesome father / son team) – and they came out and helped us isolate the problem to a worn out vacuum switch.
They performed a full rebuild service on the toilet pump, and sold us the parts and taught us how to do it so that we could service the other toilet pump in the future.
Cost: $875 (ouch! Basic gravity RV toilets are never that expensive to “service”!)
Shower Sump Replacement
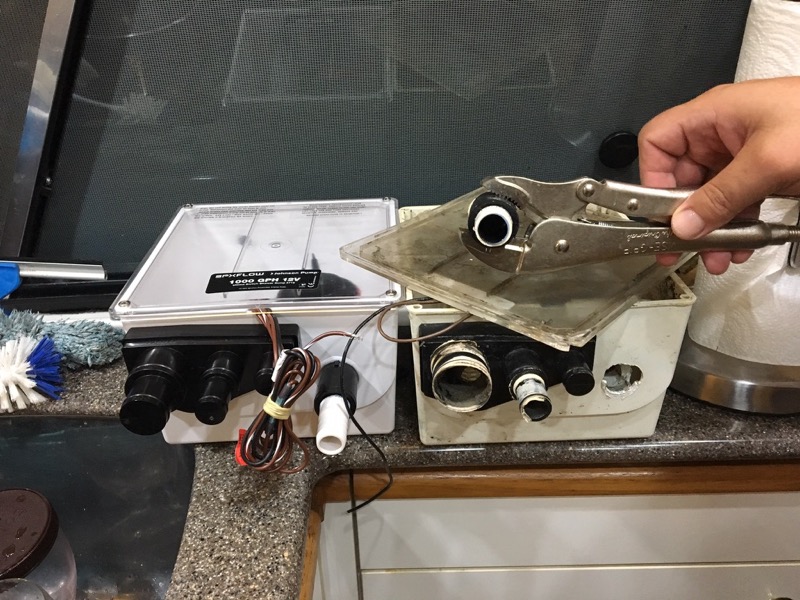
Boats like ours don’t have gray water tanks, the water just gets pumped overboard. But if a drain is below the waterline, the water passes through a special shower sump before getting pumped – and the setup on board Y-Not was slowly failing.
Normally this shower sump pump box wouldn’t be particularly difficult to replace (just three hoses, two wires, and two screws!) – but projects on boats are always harder than they appear.
We’ve discovered that things that would be easy with two hands are nearly impossible to do with one, while stretched reaching into a deep recess so that you can’t even see what you are doing.
The scars on my knuckles are only just now beginning to heal!
Cost: Pump: $124, Bandages for knuckles: $2
Fresh Water Pump (twice!)
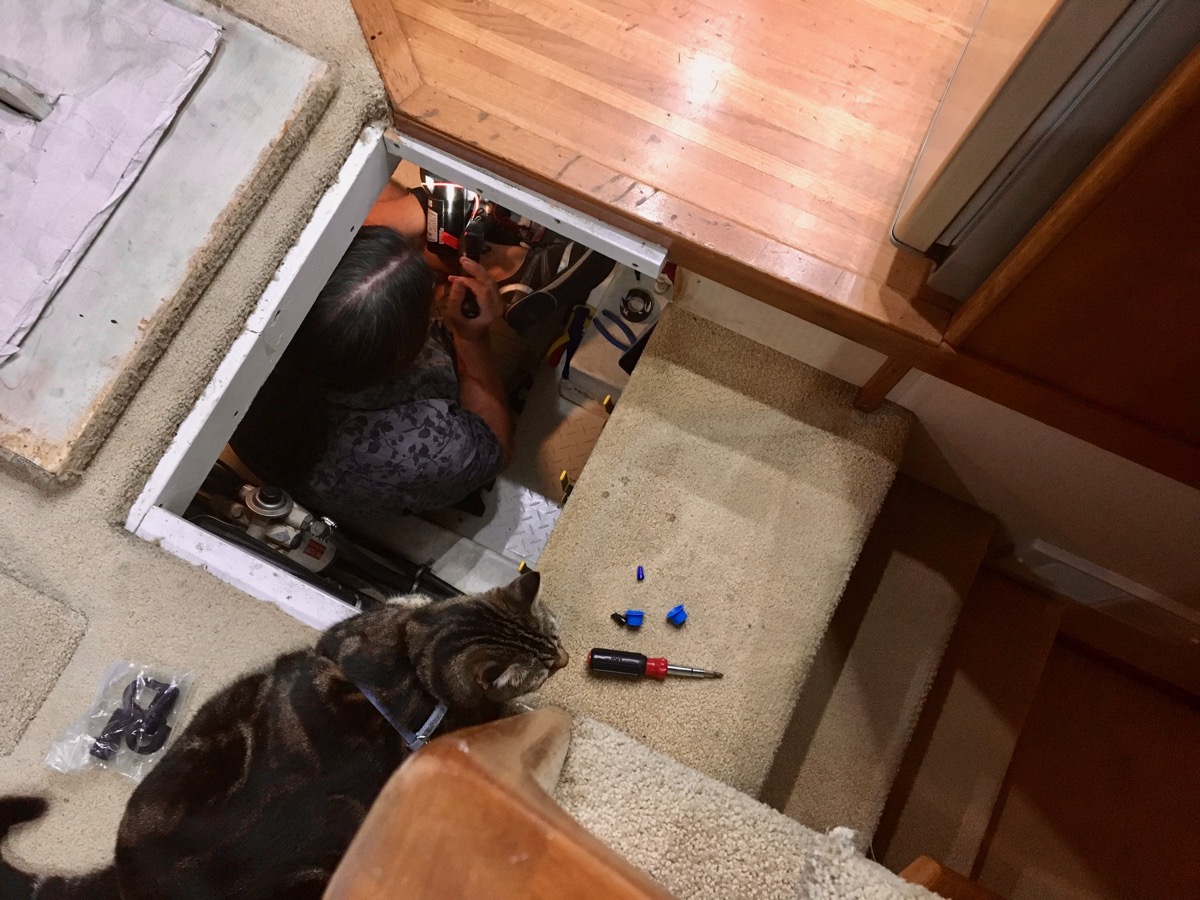
Shortly after moving aboard, the Shurflo freshwater pump locked up and died.
Fortunately there was an identical new-in-box spare on board, and it was easy to replace.
But that one died too after another month. Doh!
It turns out this old Shurflo model was notorious for internal leaks that would lead to motor failure, and it had been long ago discontinued.
To avoid the same issue happening again, I redid the plumbing to reorient the pump so it would be less likely to leak into itself, and installed a new Surflo AquaKing 2 – 4GPH.
Hopefully this one will last!
Cost: $165
New Tank Level Sender
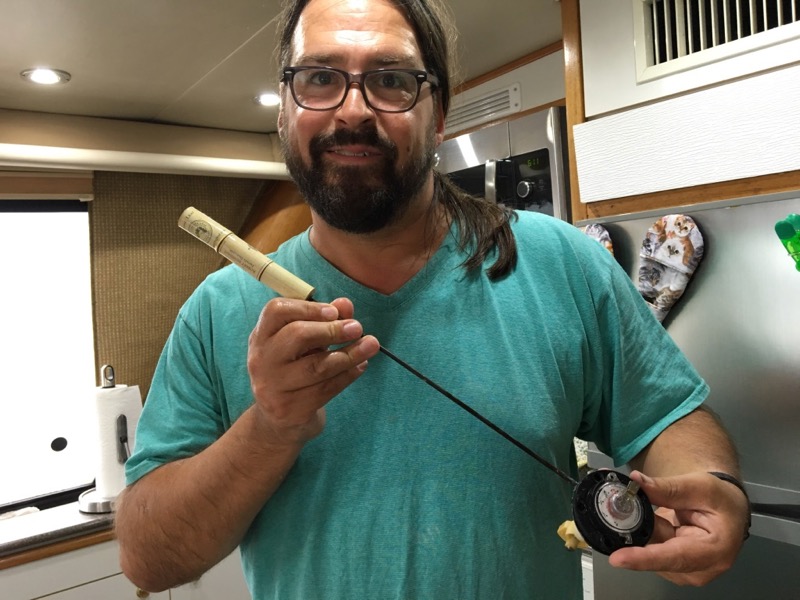
Speaking of fresh water, the gauge that showed us how much water was in our tank ranged from showing just 1/4 to 3/4 full, and was very inaccurate.
That had been on the “eventually fix” list, but it jumped up to urgent when we discovered that while filling the freshwater tank, it was leaking out the top around the seal on the old tank level sender.
Replacing the sender gave us accurate water level readings, and ended our problem with wet hallway floors!
Cost: $65
Air Conditioning Outage / Filter Upgrades
Y-Not has three AC units aboard, and one day we noticed that the pilothouse was no longer putting out any cold air.
Fortunately we ran into Craig from VIP Marine Services working just a dock over, and he was able to track the problem down to a burnt out control board that he was able to replace that very day with a spare he had in his truck. Yay!
While everything was dismantled, I cleaned the AC units and set up an intake filter system.
Cost: $550
There have been plenty of little fixes too – ranging from replacing dead bilge pumps to fixing all sorts of things that are either loose, stuck, or leaking.
That’s all just part of living on a boat.
Upcoming Projects
We’ve tackled all the most urgent projects to make Y-Not very comfortably livable, and she is pretty much ready for the adventures ahead.
But there is so much more that we want to do to make her as cool and geeky as she can possibly be.
Why?
Uhm, Y-Not!
Here are some of the current projects we are planning on.
Electrical Upgrades – Lithium Batteries & Big Inverter
We’ve lived with the benefits of lithium batteries, solar, and an advanced inverter for years now – and our current boat electrical system feels like we are frustratingly back to basics.
It is crazy that we have a better sense of the state of the batteries in our bus (currently parked on the other side of the state) than we do for the batteries on our boat, right underneath us.
We’re starting to research bringing the boat up to the level of our bus, and then well beyond.
Here are a few of our goals:
- We’d love to have enough battery power to run the bedroom AC overnight while anchored out, without running the generator.
- We want to incorporate fast charging capability to recharge the batteries with as little generator or engine runtime as possible.
- We want enough engine alternator and inverter capacity to run the salon or pilothouse AC while underway, without needing the generator and engines running simultaneously.
- We want to be able to easily see just what the state of our batteries are and how much power we are using, from anywhere.
- If generator power is needed, the system should be smart enough to start it automatically.
- And of course, we want the ability to “boost” 15A or 30A shore power, combining it with solar and battery power so that we can make do when there aren’t 50A hookups to be found.
Technology has come a long way since we designed the electrical system for our bus and built our own lithium system from scratch six years ago, and we haven’t fully done the research yet to evaluate the best of the currently available options for Y-Not.
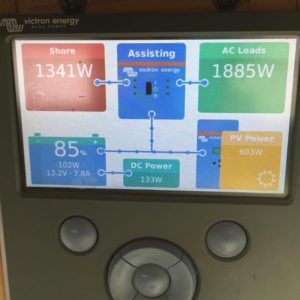
We are however fans of Victron gear (and have been long-time beta-testers for them in our bus), and a Victron Quattro and the new Venus GX seems like a great foundation to incorporate into our boat systems – allowing battery monitoring and control from all of our mobile devices.
There are a lot of lithium battery options that would integrate well with a Victron inverter and control panel – and we will have to weigh the various tradeoffs and costs to come up with our selection.
There are certainly other products and manufacturers we should be considering too – and we’d love to find a good place in Florida to help us with installing it all.
Leads and recommendations appreciated – “advice” to stick with lead batteries is not (because what fun is that?!?)
Further Reading: All our past posts about our lithium battery projects.
Electrical Upgrades – Solar Bimini!
And of course, we are itching to get some solar power on board!
Our goal is to be able to generate enough power each day for all of our basic needs, other than air conditioning.
This will make anchoring out a lot more pleasant, and will also cut way down on our dockside electrical bills.
The canvas bimini on Y-Not is very nearly shot – it is no longer even in the slightest bit waterproof, it is torn and patched, and the stitching is coming apart in several places.
When we replace the bimini, we want to incorporate solar power into the new design – as much power as is practical.
Our current quick sketch plan allows for eight 100 watt panels on the rear bimini and four on the front. We’re considering flexible panels ranging from marine-specific Solbian (expensive but reportedly top notch) or cheaper non-marine specific panels such as KingSolar, or newer versions of the Renogy, Go Power and Grape Solar panels we’ve tested for years on our RV.
These thin and light panels can be attached to a canvas bimini with zippers or velcro hinges.
Solar biminis are rare on powerboats, but sailboats have been doing them for years.
A few example installs:
- Compass Marine Solbian Install How To
- Life On The Hook – KingSolar Install
- Sailing Nandji – Ep 32 (YouTube), Installing Solbian Panels
We are also investigating using rigid panels mounted to the bimini frame and radar arch (example on another Bayliner 4788) – opening the door to larger wattage panels that will likely age better than even the best flexible panels.
Whichever way we go, we’ll of course need to make sure that it is still possible to relatively easily dismantle the bimini for a major storm or for getting under the lowest bridges on the Erie Canal. We did specifically select Y-Not for her folding arch after all.
And the whole structure needs to be strong enough to handle typical pop-up summer thunderstorms without worry too.
We’d love to find a great bimini / canvas shop who is interested in helping us tackle this project.
Further Reading: All our past posts about our RV solar projects.
Onboard Entertainment & Lighting
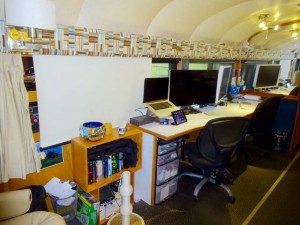
We love movie nights, and we miss the big-screen projector system we had in our bus.
For the boat – we want a big screen too. But there is too much ambient light for a projector, and we do not want a big black mirror out all the time.
Our plan instead is to incorporate a pop-up 50″ TV into the cabinet on the port side of the salon, under the windows. It’s a modification other Bayliner owners have documented.
It means giving up a bit of storage, but we have plenty.
We also want to set up a multi-zone sound system, and dimmable / smart lighting throughout the boat.
Every room already has wall-mounted speakers, but the original amp system was long-ago removed and we need find an appropriate modern replacement better suited to wireless streaming than an auto-reverse double cassette.
But for now we have been doing just fine having movie nights using a 21″ 4K iMac on the table, with our new Bose SoundLink Mini 2 providing decent (and portable) sound.
Carpentry Projects!
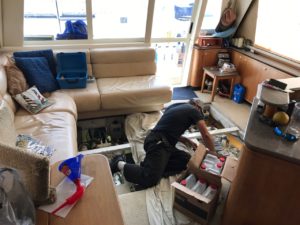
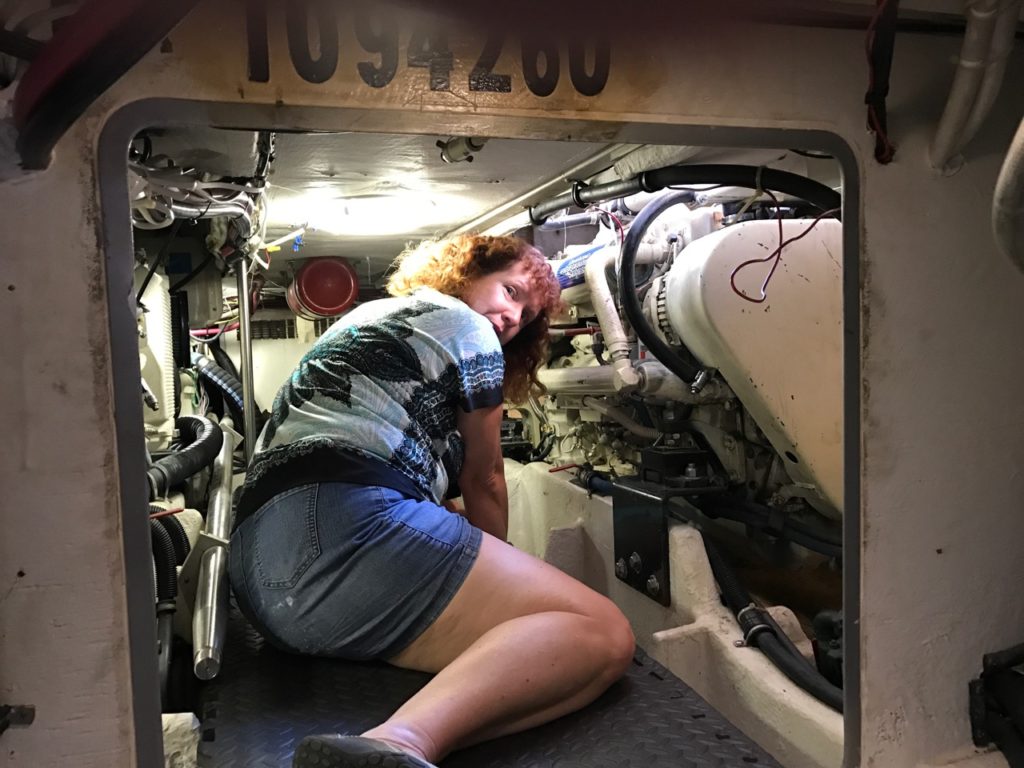
Our most urgent carpentry project involves cutting a hatch into the middle of our living room floor to make access to the engine room vastly easier.
Other Bayliner owners who have tackled this say the project is relatively quick and easy – if you have access to the right tools.
Easier access to the engine room will make a lot of other projects easier to tackle – as well as greatly simplifying general maintenance and checks.
This project will pay for itself in no time.
Once we find the right person with the skills and the tools, we have a few other carpentry projects in mind too:
- Kitchen Counter / Cabinet – Our induction cooktop is designed to be inset into a counter, and for now it is just sitting on top of the old Princess electric range. We want to remove the old oven and turn that space into a storage cabinet with induction inset into the new counter on top.
- TV Cabinet (Old & New) – If we are cutting countertops and cabinets, that would be the perfect time to make the modifications for the new pop-up TV lift, and to turn the old tube TV cabinet into more useable and finished storage.
- Pilothouse Office Desk – We want to build a custom sit / stand desk into one side of the pilothouse.
- Admiral’s Ready Room – The bench seat on the back wall of the pilothouse has a storage area that could be re-purposed as a private and ventilated cat chamber, we just need to cut a cat door into it. Admiral Kiki is eager to have a room all her own.
Marine Electronics & Engine Instruments
The marine electronics onboard Y-Not are serviceable, but ancient.
And that was actually a selling point for us.
We knew that we would want to geek out with modern systems – and now we get to essentially start with a blank slate.
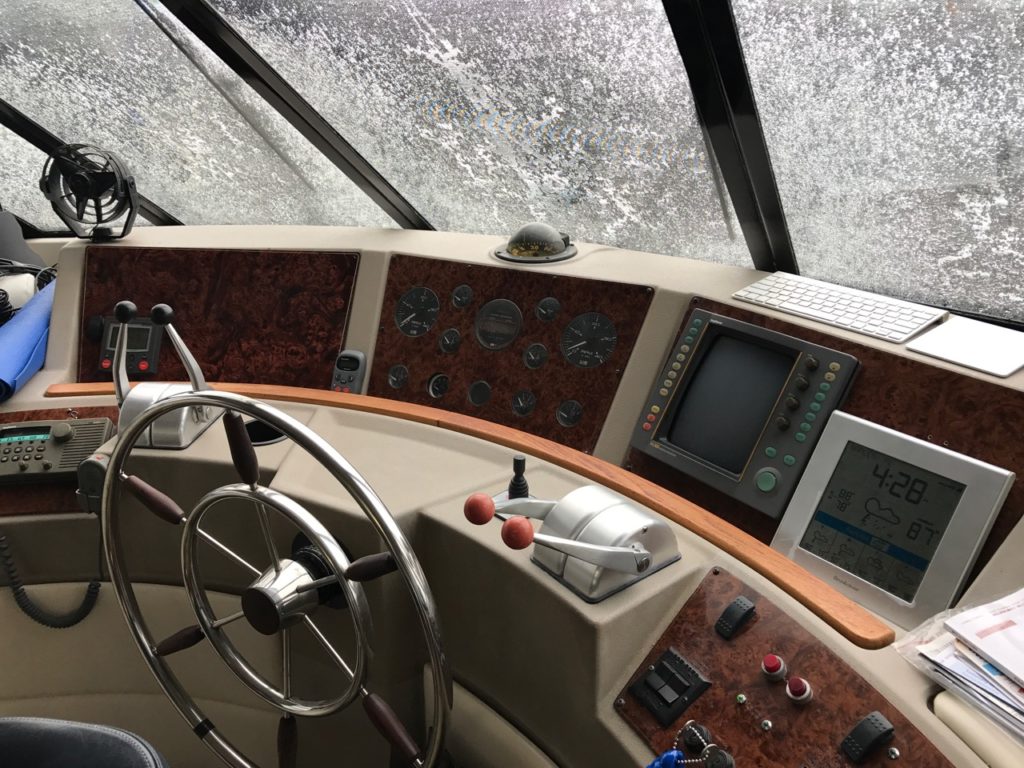
Here’s what we have at the moment, and what we are contemplating:
Engine Instrument Upgrades
Right now we have just basic gauges, and many of them are out of calibration.
In particular, we have three tachometers per engine (upper digital and lower analog / digital) – and they all disagree with each other.
We want to upgrade our gauges to be networked, and in particular we want to incorporate fuel flow monitoring (via a FloScan or something similar) so that we can see our accurate fuel consumption and MPG readout – letting us dial in our ideal cruising speeds.
We are also eager to add an exhaust gas temperature sensor to better track the health of our engine over time.
VHF Radio
We currently have a basic handheld VHF and a serviceable Uniden UM-625C on the flybridge (with a remote handset), but the ancient Pilothouse Raytheon VHF is long dead.
We aim to replace it with an a much more advanced modern radio, such as the Standard Horizon GX2200.
This radio incorporates an AIS (Automatic Identification System) receiver that will let us see the name, location, speed, and heading of many other boats (including all commercial traffic) nearby.
Weather Station
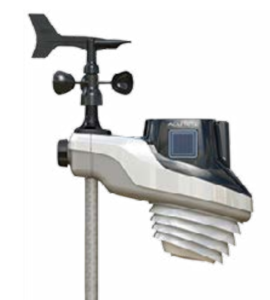
We are not just weather geeks, but keeping on top of the weather is critically important aboard a boat. We need to have a better sense of the current outside conditions, particularly wind speed.
There are fancy marine systems to be had, but we are tempted to repurpose a basic residential weather station system.
Steve Mitchell recently posted a great tutorial about how to geek out with a remote weather station over at Sailbits, and the original Technomad Steve Roberts shared his weather station project here.
At the moment I am researching the AcuRite Pro Weather Station, which comes bundled with lightning detection. Or we may just keep things cheap and simple, and go with a basic 3-in-1 system that tracks just wind speed, temperature, and humidity.
Sonar / Depth Sounder
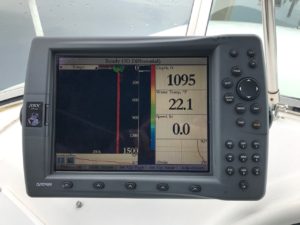
Knowing how much water is under your hull is critical information, especially for the shallow water coastal cruising we are planning.
And at the moment – we are really lacking here.
Y-Not has a depth sounder readout on the flybridge that is barely readable if you squint, and in the pilothouse the autopilot display can also show the current depth.
But there are more advanced options available now – some which even give you a 3D view of the bottom, or a look ahead at potential underwater obstacles in your path.
The biggest challenge for us will be figuring out the best sonar for cruisers who aren’t interested all that interested in fishing, since most of these products are focused on fishermen.
Radar
The old Raytheon R41XX radar system that came with Y-Not is completely dead, and it isn’t worth the effort to repair when there are so many amazing modern options available.
Whatever we choose – we will want it to integrate with the navigation system.
Auto Pilot
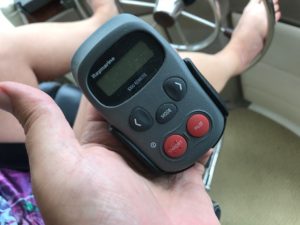
The Raymarine ST6000+ Autopilot on board seems to be fully functional, and it even has a handheld remote so that we can make course corrections while away from the helm.
But we want to be able to integrate the autopilot into an onboard navigation system, and at the moment Y-Not is lacking in this regard.
Chart Plotter
The heart of the marine electronics system is a chart plotter – displaying maps, radar, sonar / depth, and more – we even plan to integrate a backup camera to ease docking.
Y-Not came with an old Garmin GPSMAP-2010C that mounts on the flybridge, but the state of marine electronics has come a LONG way since then – and we want to invest in something much more advanced to bring all of our systems together.
The starting point is picking a brand – Garmin and Lowrance seem to have die-hard fans akin to Ford vs Chevy, and there is also Simrad, Raymarine, and others to consider.
Our goal is advanced geekery, awesome UI, high resolution interactive maps, and a focus on ease of use.
Portable Chart Plotter
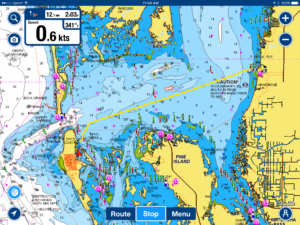
In addition to an integrated chart plotter, one you can carry around with you is ideal for planning – and for taking along on dinghy trips.
We’ve been using two iPad Mini’s for this purpose, and the state of iPad navigation software is awe inspiring.
We’ve been using Navionics+ on one iPad as our primary navigation system, and Garmin BlueChart Mobile (synced with Active Captain) for planning stops.
We’ll probably upgrade from an iPad Mini to the new 10.5″ iPad Pro, which should prove to be even more potent of a system. Any new integrated chart plotter we install should be able to use an iPad as a remote display too.
The challenge with the marine electronics upgrade project is just how much advanced planning is required, since you really only want to tackle running wires, installing antennas, and modifying dashboard cutouts once.
We are currently building up a file of suggestions, and when the time is right we’ll likely tackle this upgrade all at once.
At the same time – we’ll want to install our long-range cellular and Wi-Fi gear onto the radar arch, as well as run some ethernet LAN wiring to strategic locations on board too.
BTW – We are always particularly interested in getting involved with beta testing the newest and neatest gear, and we are used to being pioneers with arrows in our back.
If anyone has any insider info on cool new marine electronics gadgets coming out soon, be in touch!
Other Looming Projects
We have a few other relatively big projects that we’ll want to tackle at some point.
- Improved Fire Safety – We have an engine room fire extinguishing system, but it should be upgraded to automatically cut the engines if it is ever triggered. We also want to install networked fire and CO detectors throughout the boat, tied to a central alarm. And of course re-install the remote camera into the engine room for remote monitoring.
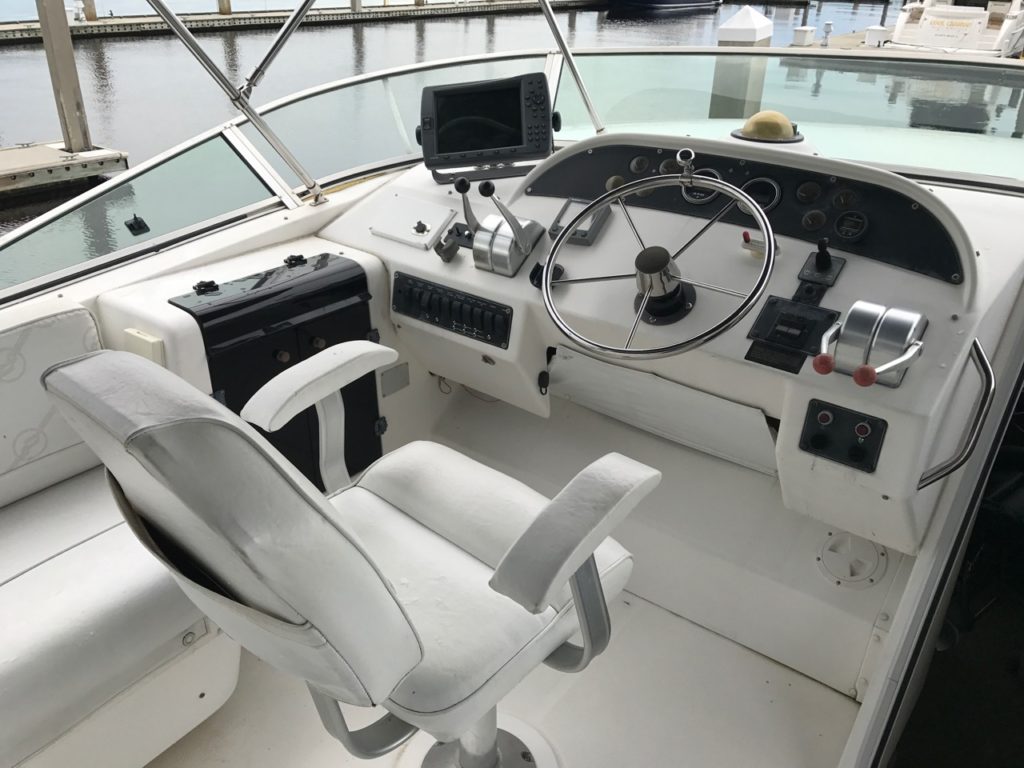
- New Helm Seats – We want to replace the lower helm seat with one that can double as an office chair for the desk we plan to build in, and we want to replace the upper helm seat with one that can flip between standing and sitting driving positions.
- Cockpit Roof Hatch – We want to add a transparent hatch to cover the opening for the ladder from the cockpit to the flybridge. This will eliminate the risk of anyone ever accidentally falling through, and it will keep the cockpit a lot drier in the rain.
- Redo Sewage Hoses – The sewer hoses on board are nearing the end of their useful life, and sometime in the next year or so we should plan on replacing them. This is likely to be an unpleasant job indeed.
- Fix Various Leaks – Several of our windows and hatches need to be re-sealed, and there are a few minor roof leaks as well. Tracking them down and sealing them up is a constant battle – and at some point we may want to hire a boatyard to remove and reseal around the entire rub rail.
So What First?
As always – we steer by serendipity, and we’ll tackle each project in turn when the timing feels right.
Particularly if we stumble across great places to work with or people to help us with a given upgrade, then that project naturally jumps to the top of the list.
And if something breaks – that jumps it to the top as well.
But overall – we’ve managed to get Y-Not into an extremely comfortable and functional state. So if a project takes us a year to plan out and do right, that is fine by us.
For a research-loving geek like me, planning a project can end up being half the fun. *grin*


batteries — nickle-zinc for fast charge and possibly longer life. L3 only useable size I’ve found for house batteries. Also, what about 110v engine alternators and battery bank ?
— edward
I’ve never seen a 110V engine alternator – and that sort of AC power couldn’t directly charge a DC battery bank.
I am looking deeper into some alternative battery chemistries though. Not many options available yet, but there are some.
– Chris
Chris — you would likely profit from and enjoy spending some time here: http://mvdirona.com/
Basically an on the fly primer on geeking up a trawler. Well written and performed. Of special note are James Hamilton’s design for an electrical system, intergrating with Raspberry Pi, and integrated controls/monitoring in general.
I’ve run across that site before – thanks for reminding me of it. It is indeed a great resource!
– Chris
Hi, Long time reader, first time commenter. First, thanks for all the information and experiences you provide here. I’ve found it immensely helpful in my own RV electrical upgrades. When I was indecisive about the charger/inverter to buy, my dear wife suggest ”Just buy what Technomadia uses, it works for them, right?”
I installed a MutiPlus, CCGX, BMV-702, and MPPT 100/50 in June. I deviated from your setup with 540 Ah of bottom balanced CALBs and Suaokai flexible solar panels. The system (plus a backup generator for cloudy days) kept our residential refer and mini-fridge running non-stop for 2 weeks straight of dry camping in July. The wife and kids also used the microwave, toaster, or vacuum like they were grid-tied.
You guys are probably more the experts on all the Victron equipment than me, but I’d be happy to share more thoughts on alternative Lithium batteries and solar panels. Also, would you be interested in swapping configuration setting on the MutliPlus? Thanks and Regards.
I do remain a Victron fan, and have been eagerly scoping out the inverter and battery options for the boat. I’m glad to hear your system is working out nicely for you!
If you’d like to swap some configuration settings and/or battery thoughts, drop an email to contact@technomadia.com and I’ll be on the lookout to reply.
Cheers!
– Chris
Hi Matt, sounds like we have almost identical setups. Would love to swap info with you about the Victron and the CALBs.
jimlass@gmail.com
Hi! Just wanna start with a big thanks for all you articles! Getting on topic, I recently had to make some pretty big decisions about NAV on my sailboat. Seeing that your both geeks like me, I found a system that worked pretty well. Instead of installing a an embedded system like the Raymarine (which we already had on board like you), I went with a combo AIS system that included Wifi. The interesting part of that is once you get the NMEA sentences available on you network it opens up some pretty impressive possibilities. The big one is that you can spend less money on equipment because it no longer needs embedded AIS or GPS.
We installed the Vesper Marine XB-8000 and paired that with an Ipad, Macbook pro, and a Standard Horizon GX2000 (with a remote handset). The really cool thing is that you can set up a separate VHF antenna for the AIS which reduces the cost of a splitter. The issue I found with the splitter is the location refresh rates were pretty poor. I loved being able to crash out while someone else was on watch, but still have the Ipad giving me real time updates below decks. Only thing missing was incorporating radar into the feed, but there are some options available that work with OpenCPN, I just never got a chance to test them.
I never got around to it, but this started me thinking about building a DC powered linux mini with a daylight readable touch screen to replace my commercial embedded systems. There are a number of really good NAZV software options for mac and linux.
Thanks again for alll your great work!
Whew, what a list. Makes me think of all the things I need to repair/upgrade here at my dad’s. I especially like to follow your solar upgrades. You have been raving about that induction cooktop for so long now, I am curious to try one. But enough blab from me. Enjoyed the post. Thanks.
Having recently run aground in Florida’s notoriously shallow waters resulting in two bent and torn propellers on my brother’s 45 ft Tollycraft, I have a comment on your chart plotter thoughts.
I discovered that the only digital charts that have detailed shallow water data are Navionics. The rest (Garmin, C-Map, NOAA) are useless in shallow waters. When we ran aground, the Garmin was showing no dangerous depths at all. But Navionics showed all kinds of contours with depths — and it said we were headed for 2 ft. of water. The boat drew 3 ft. Had my brother been watching my tablet running Navionics instead of the boat’s Garmin, he probably wouldn’t have run aground.
A week and several thousand dollars later, we were back in the water.
So, my conclusion is that you want a chart plotter that can take Navionics data cards. Garmin won’t allow 3rd party data cards. Nuff said?
Simrad (same company as Lowrance except that Simrad is their big boat line), Raymarine and I believe Furuno all accept Navionics data cards.
My last suggestions are that you try the software and user interfaces on the various brands before you buy. They’re not the same and some require far fewer taps or button pushes to accomplish the same things.
Also consider operating these devices as the boat rocks and rolls. I found that touch screen control was great when it was calm. But when things got rough, my fingers bounced all over the screen doing all kinds of unintentional (and bad) things. So sometimes low-tech buttons are better. Consider a system that has BOTH touch-screen and physical buttons.
Fantastic well earned tips.. thanks so much for sharing.
Great list of upgrades… Looking forward to following your progress on them. Love seeing the AGLCA burgee on your boat.
I know you like the peace and quiet over there on the West Coast,, however I think all The things you’re looking to tackle would be better on the East Coast say Miami Fort Lauderdale Hollywood area.
I’m not trying to spend your money but the multitude of talent in those three areas
Far exceeds anything you find on the West Coast.
Plus docking is cheaper in the summer.
Indeed.. that’s why we’re calling it a wrap on boat projects over here, and anxious to get to the East Coast for the next round. The west coast is lovely, but you know I’m a Space Coast girl at heart 🙂
Chris and Cherie you guys are awesome, came here to mostly check out the plans and parts used for the solar setup, stayed for the great build article. Are those new window covers removable? Curious if you can outfit say an RV or car/van windows using the material.
Thanks. Yes, the window covers are just snapped on. In our RV, we have similar shades but on the inside of the windows (we have the MDC brands). We’re far more mobile in our RV and didn’t want the hassle of things to take down.